Deploying Workload
In this section we will deploy a simple Wordpress application with MYSQL as the backend database store.
We will test backup and recovery of this application in next section.
Deploying Wordpress App
In your LinuxToolsVM on the browser
Create a new directory for your wordpress application and configuration files
mkdir wordpress
cd wordpress
Make sure default is the current namespace
oc config set-context --current --namespace=defaultDownload wordpress and mysql config yaml files
curl -LO https://raw.githubusercontent.com/nutanix-japan/ocp-hci/main/ocp_wordpress_deploy/mysql_deployment.yaml
curl -LO https://raw.githubusercontent.com/nutanix-japan/ocp-hci/main/ocp_wordpress_deploy/wordpress_deployment.yaml
We need to grant
anyuidsecurity context constraint to the service accountoc adm policy add-scc-to-user anyuid -z defaultcautionTake care with granting Security Contenxt Constraints in production environments.
Make sure the
nutanix-volumeis the default storage classoc get scIf it is not default, run the following command
oc patch storageclass nutanix-volumes -p '{"metadata": {"annotations":{"storageclass.kubernetes.io/is-default-class":"true"}}}'Create kustomization file to specify mysql password]
cat << EOF > kustomization.yaml
secretGenerator:
- name: mysql-pass
  literals:
  - password=XXXXXXX # change to your preferred MYSQL password
resources:
  - mysql_deployment.yaml
  - wordpress_deployment.yaml
EOF
Edit the kustomization.yaml to change your MYSQL password to a preferred password
vi kustomization.yamlApply all your configuration files
oc apply -k ./Monitor pods until they are running
oc get po -w# Sample output for the command above
NAME READY STATUS RESTARTS AGE
pod/wordpress-9c5b954c6-vdp4r 1/1 Running 0 3m11s
pod/wordpress-mysql-77756785c8-vgtvb 1/1 Running 0 3m11s
Exposing Wordpress to the World
Once both mysql and wordpress pods are running, we can expose the wordpress service to be able to access wordpress\' Web UI.
oc expose service/wordpressOutputroute.route.openshift.io/wordpress exposedinfoOCP exposes internal services to the outside world using the concept of routes. This routes concept existed even before the popular kubernetes Ingress object was developed.
As a result, when you create Ingress object in latest versions of OCP, this will automatically create routes in the background.
For more information about OCP Routes see here.
Get the OCP route information by running the following command
oc get routeOutputNAME HOST/PORT PATH SERVICES PORT TERMINATION WILDCARD
wordpress wordpress-default.apps.xyz9.ntnxlab.local wordpress 80 NoneAdd to the hosts file entry on your Mac/PC for accessing Wordpress UI with the following content:
- Template Hosts File
- Example Hosts File
10.x.x.x       pc.ntnxlab.local
10.x.x.x       console-openshift-console.apps.ocpuser0X.ntnxlab.local
10.x.x.x       oauth-openshift.apps.ocpuser0X.ntnxlab.local
10.x.x.x       k10-route-kasten-io.apps.ocpuser0X.ntnxlab.local
10.x.x.x wordpress-default.apps.ocpuser0X.ntnxlab.local10.42.18.7 pc.ntnxlab.local
10.38.18.220 console-openshift-console.apps.ocpuser01.ntnxlab.local
10.38.18.220 oauth-openshift.apps.ocpuser01.ntnxlab.local
10.38.18.220 k10-route-kasten-io.apps.ocpuser01.ntnxlab.local
10.38.18.220 wordpress-default.apps.ocpuser01.ntnxlab.localCopy the value of HOST/PORT field and prepend a
http://to it as we not using SSL (secure) terminationYour route should look as follows:
- Template URL
- Sample URL
http://wordpress-default.apps.ocpuserXX.ntnxlab.localhttp://wordpress-default.apps.ocpuser01.ntnxlab.local
Copy the URL and paste in a browser in your Mac/PC
You should see a configuration page
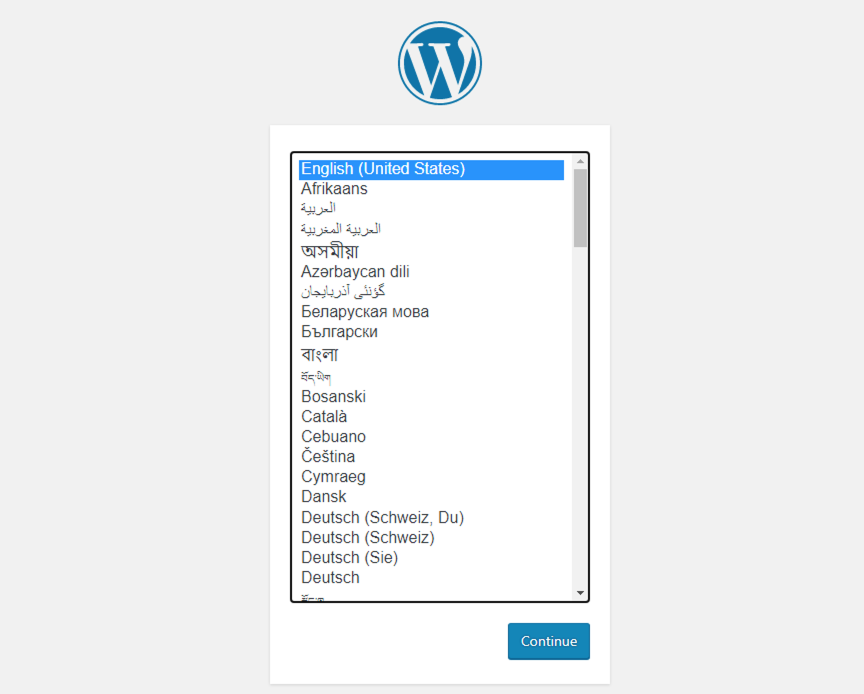
Select English - United States and click on Continue
Fill in the following fields as shown in the figure below
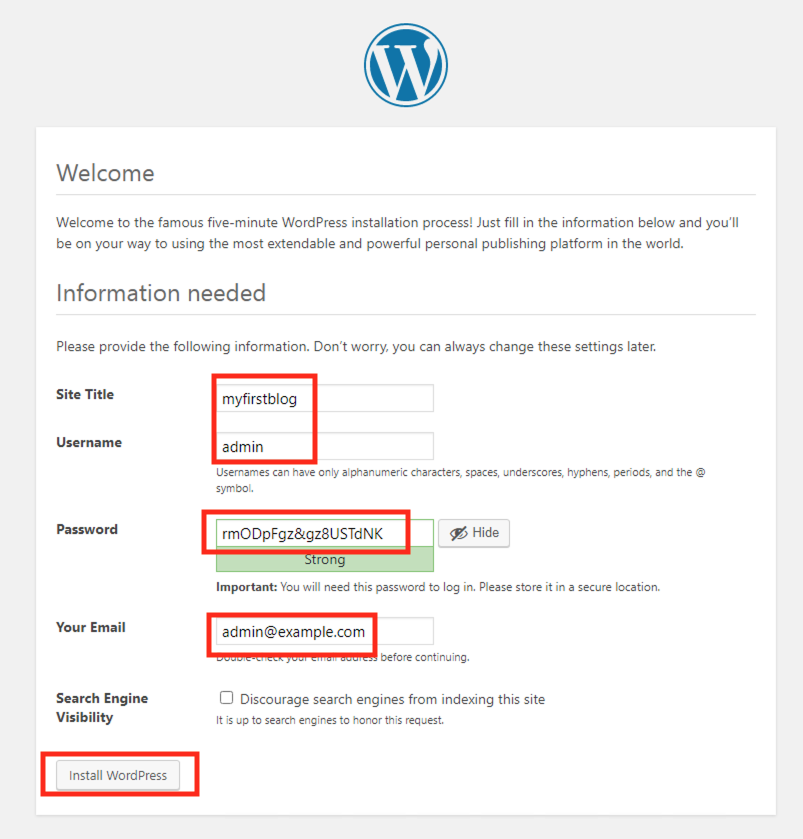
Note the auto-generated password and copy it somewhere safe. You are also free to use your own password.
You should see a installation confirmation page
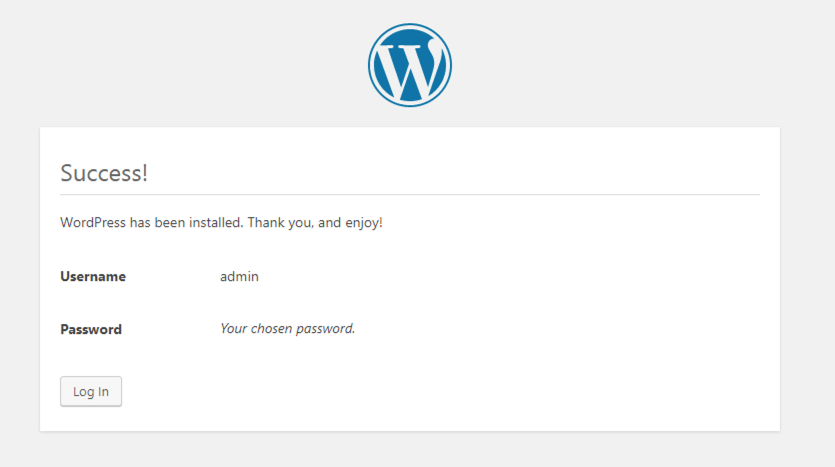
You will get re-directed to login page
Login to the wordpress site using admin and the password you used to install wordpress application
You will see the wordpress administration page
Lets populate some data by creating a new admin user
Click on Users > Add New
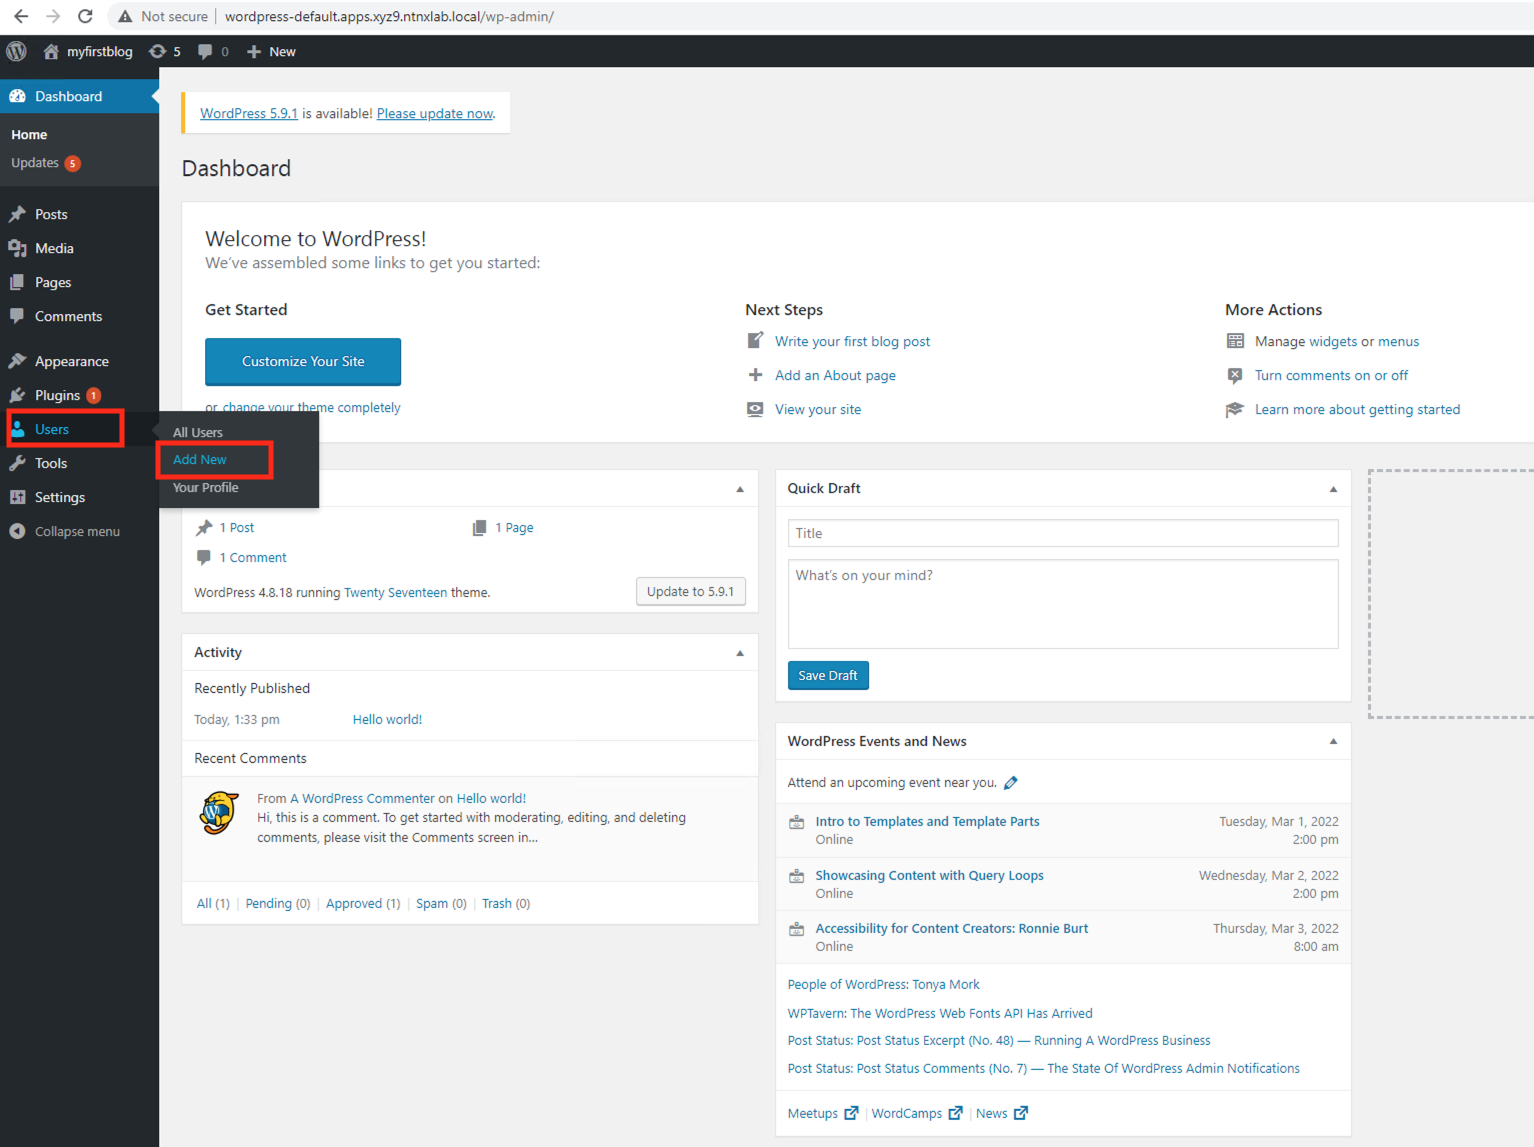
Fill in the following fields as shown in the figure below
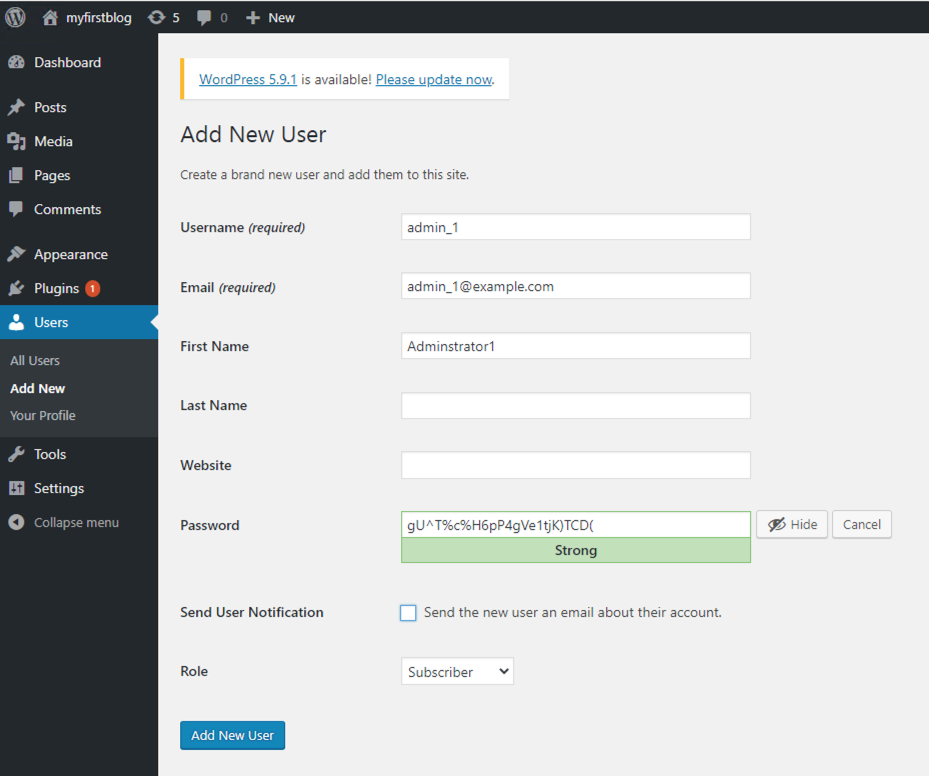
Click on Add New User
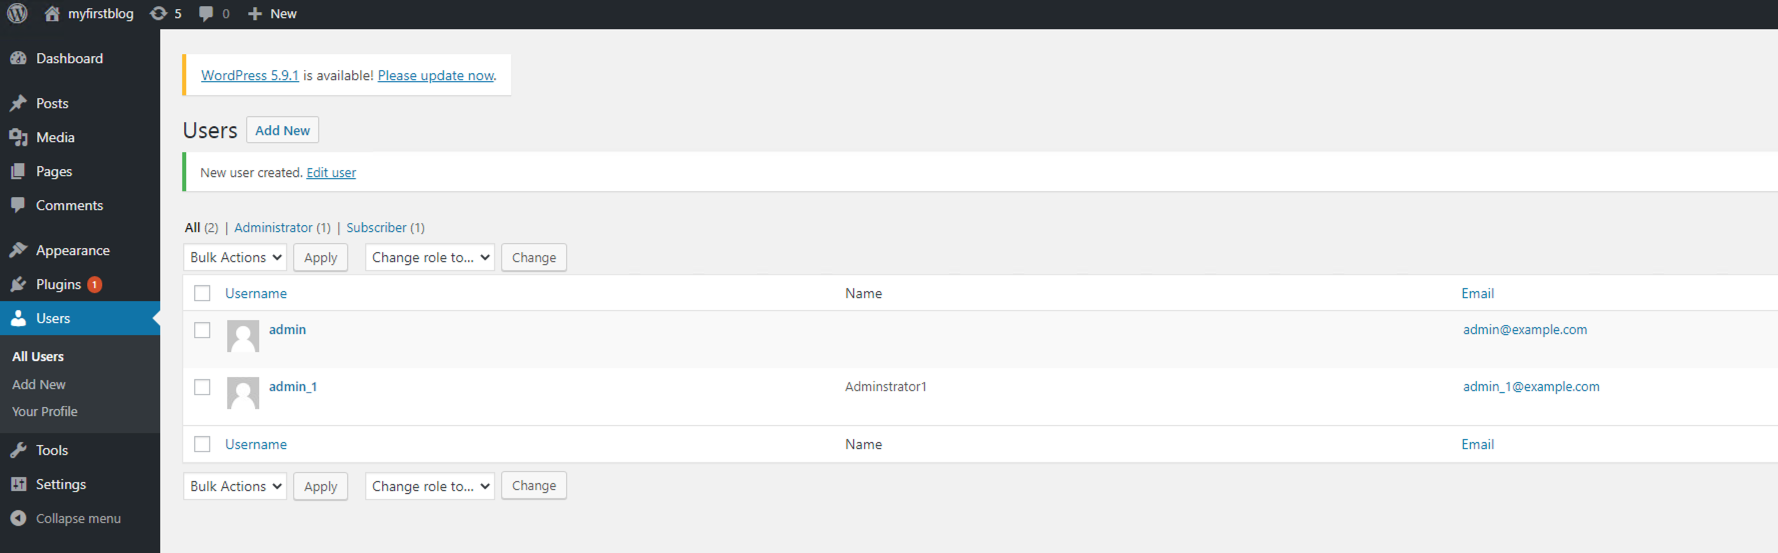
You will be able to see the list of users
You have succesfully set up Wordpress application with mysql backend. In the next section we will backup and restore a deleted wordpress user using Kasten K10 software.