OCP: Deploy Nutanix CSI for OCP
In this section we will enable your deployed OCP cluster to have access to Nutanix HCI storage in the form of StorageClass, Physical Volumes and Pysical Volume claims.
We will also install kubernetes operator provided by Nutanix to maintain the lifecycle of operator.
See What are Kubernetes Operators? for more information.
OpenShift provides a easy way of implementing these third-party operators via OperatorHub from the cluster manager GUI .
As the Nutanix CSI Operator provides the following capabilities as of now, we will install it to manage all our Nutanix StorageClass in this OCP cluster.
- Basic install
- Seamless upgrades (Manual or Automatic)
In future Nutanix CSI Operator may provide the following additional features:
- Full lifecycle
- Deep insights
- Autopilot
Nutanix CSI supports Nutanix Volumes and Nutanix Files as backend data storage systems.
| Storage Class Mode | ReadWriteOnce | ReadOnlyMany | ReadWriteMany |
|---|---|---|---|
| Nutanix Volumes | Yes | Yes | No |
| Nutanix Files | Yes | Yes | Yes |
In this lab, we will deploy both Nutanix Volumes and Files Storage Class and use them throughout the bootcamp.
Install Nutanix CSI Operator
Using Chrome browser browse to Console URL you obtained in the previous section.
https://console-openshift-console.apps.<initials>.ntnxlab.local# example URL
# https://console-openshift-console.apps.ocpuserXX.ntnxlab.localUse your credentials to Login
- Username - kubeadmin
- Password - password from previous section
Click on Log in (if you are not already logged in)
Click on Operator > Operator Hub
You will see all third party operators categorised by solution driven use cases (e.g. Big Data, Database, etc)
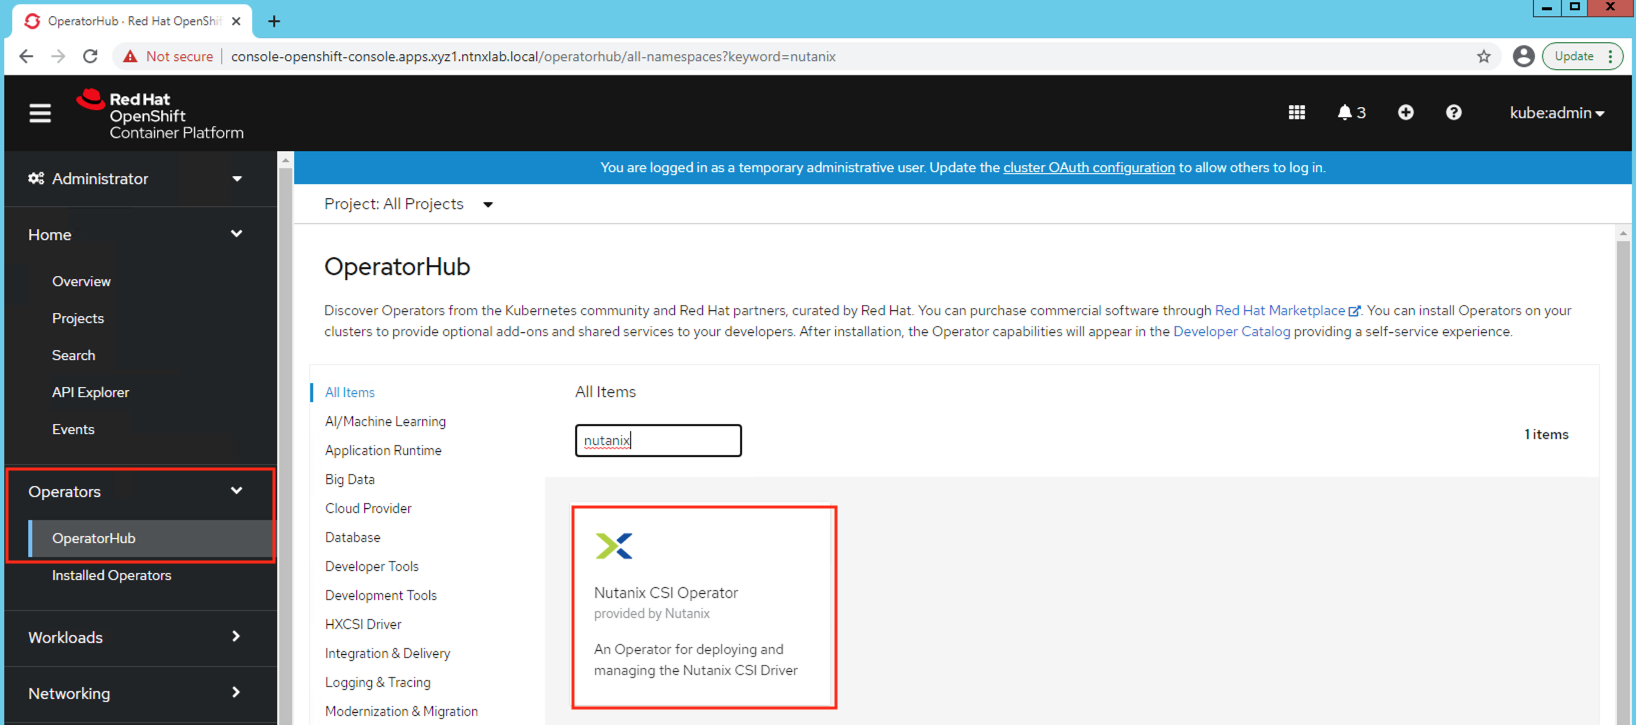
This is in principle similar to Nutanix Calm Marketplace where you can request and install applications.
In the Filter by Keyword text box, type Nutanix to find the Nutanix CSI Operator
Click on the Nutanix CSI Operator, verify Operator version to be at least
3.3.0and click on InstallMake sure to check the supported orchestration (RH OCP platforms)
In the Operator install wizard choose the following:
- Update channel - stable
- Operator recommended Namespace -
openshift-cluster-csi-drivers(automatically chosen) - Update approval - Automatic (admins usually choose Manual option where control over updates is necessary)
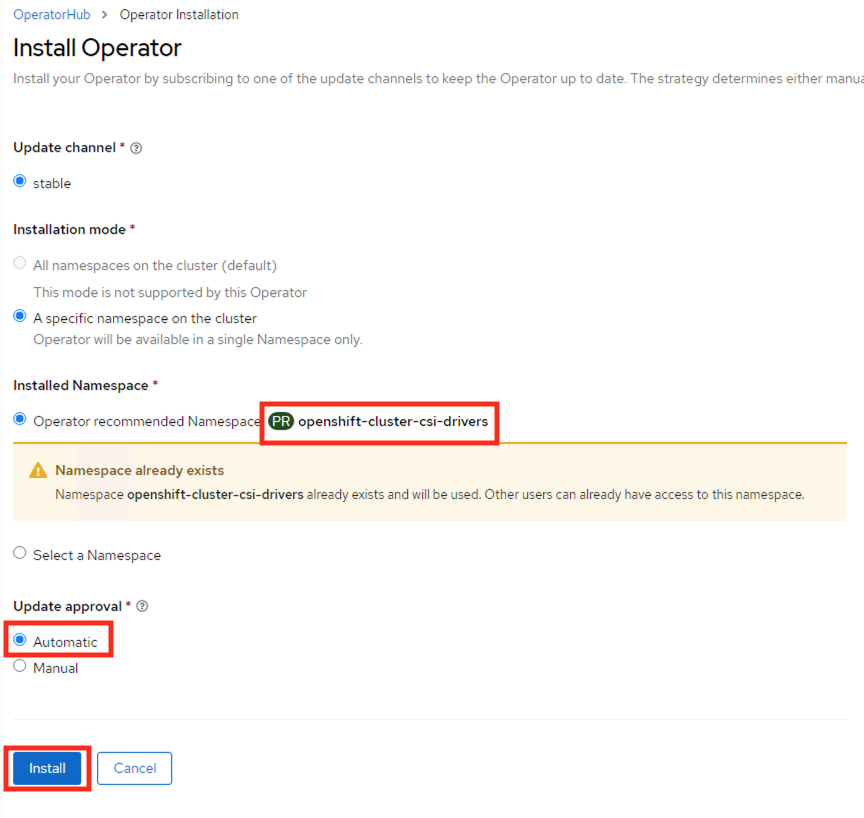
Click on Install
Once installed you will see the operator in Operator > Installed Operators
Create a NutanixCsiStorage resource to deploy your storage driver
cat << EOF | oc apply -f -
apiVersion: crd.nutanix.com/v1alpha1
kind: NutanixCsiStorage
metadata:
  name: nutanixcsistorage
  namespace: openshift-cluster-csi-drivers
spec:
  ntnxInitConfigMap:
    usePC : false
EOF
This will create a NutanixCsiStorage resource to deploy your driver.
You have successfully installed the Nutanix CSI operator to take care of StorageClass installation and upgrades.
Install StorageClass with Nutanix Volumes
- Logon to your UserXX-LinuxToolsVM Terminal in the browser using
code-serverthat you installed in the previous section
Export the OCP cluster's KUBECONFIG file to environment so we can perform
occommandsexport KUBECONFIG=/home/ubuntu/ocpuserXX/auth/kubeconfigCreate two kubernetes secret that the StorageClass can use to access the Nutanix HCI storage
Use the following Secret configuration script, modify required fields (highlighted)
Be sure to use your environment's details for the following fields:
- Prism Element IP
- Prism Element UserName
- Prism Element Password
cat << EOF > ntnx-pe-secret.yaml
apiVersion: v1
kind: Secret
metadata:
  name: ntnx-pe-secret
  namespace: openshift-cluster-csi-drivers
stringData:
  key: <Prism Element IP>:9440:<Prism Element UserName>:<Prism Element Password>    # << change this
  # example:
  # key: 10.38.2.37:9440:admin:password
EOF
# Modify the highlighted fields to suit your environment
vi ntnx-pe-secret.yaml# Create the secret
oc apply -f ntnx-pe-secret.yaml# example output here for the above command
# secret/ntnx-pe-secret createdCopy the following StorageClass configuration script, modify
Storage Container Namefield and execute it in the command linecat << EOF > storageclass.yaml
kind: StorageClass
apiVersion: storage.k8s.io/v1
metadata:
name: nutanix-volumes
annotations:
storageclass.kubernetes.io/is-default-class: "true"
provisioner: csi.nutanix.com
parameters:
csi.storage.k8s.io/provisioner-secret-name: ntnx-pe-secret
csi.storage.k8s.io/provisioner-secret-namespace: openshift-cluster-csi-drivers
csi.storage.k8s.io/node-publish-secret-name: ntnx-pe-secret
csi.storage.k8s.io/node-publish-secret-namespace: openshift-cluster-csi-drivers
csi.storage.k8s.io/controller-expand-secret-name: ntnx-pe-secret
csi.storage.k8s.io/controller-expand-secret-namespace: openshift-cluster-csi-drivers
csi.storage.k8s.io/controller-publish-secret-name: ntnx-pe-secret
csi.storage.k8s.io/controller-publish-secret-namespace: openshift-cluster-csi-drivers
csi.storage.k8s.io/fstype: ext4
storageContainer: default # <<< Make sure this Storage Container is present in the Nutanix cluster
storageType: NutanixVolumes
#description: "description added to each storage object created by the driver"
#hypervisorAttached: ENABLED
allowVolumeExpansion: true
reclaimPolicy: Delete
EOF# Modify the highlighted fields to suit your environment
vi storageclass.yaml# Create the storage class
oc apply -f storageclass.yamlList your StorageClass
oc get StorageClass -A
Starting iSCSI Daemons on OCP Nodes/VMs
Create a machine config to make sure iSCSI service starts in worker and master nodes.
cat << EOF | oc apply -f -
apiVersion: machineconfiguration.openshift.io/v1
kind: MachineConfig
metadata:
  labels:
    machineconfiguration.openshift.io/role: worker
  name: 99-worker-custom-enable-iscsid
spec:
  config:
    ignition:
      version: 3.1.0
  systemd:
    units:
      - enabled: true
        name: iscsid.service
EOF
cat << EOF | oc apply -f -
apiVersion: machineconfiguration.openshift.io/v1
kind: MachineConfig
metadata:
  labels:
    machineconfiguration.openshift.io/role: master
  name: 99-master-custom-enable-iscsid
spec:
  config:
    ignition:
      version: 3.1.0
  systemd:
    units:
      - enabled: true
        name: iscsid.service
EOF
We have sucessfully installed Nutanix StorageClass so we can provision Physical Volumes (PV) and Physical Volume Claims (PVC) for the applications we will be deploying in this OCP cluster.
Testing PVCs
Here are some sample manifests to create pvc using the Volumes and Files offering from Nutanix.
Test creating pvc using Volumes
cat << EOF | oc apply -f -
apiVersion: v1
kind: PersistentVolumeClaim
metadata:
 name: test-volumes-pvc
spec:
 storageClassName: nutanix-volumes   ## << Optional as this SC is already default
 accessModes:
   - ReadWriteOnce
 volumeMode: Filesystem
 resources:
   requests:
     storage: 1Gi
EOF
Check if the pvc is
Boundoc get pvcMake sure the pvc is
Bound. If not, use the troubleshooting steps below.Do not move on to the next labs if this section is not complete. Connecting CSI storage is vital for the rest of the labs.
Are your pvc(s) not bound?
If any of the pvc(s) are not bound you may want to check the following:
The secret you created earlier and the credentials you used there for Prism Element
For Files pvc - make sure you are using case sensitive file server name and not using FQDN of the file server
Always be checking logs
oc get events --sort-by='.lastTimestamp' # sort by date for the namespace you are currently working inoc get events --sort-by='.metadata.creationTimestamp' -A # sort by date for all namespacesoc describe pvc test-volumes-pvc
You have seen how easy it is integrate Nutanix storage capabilites with Red Hat OCP. It took us less than a few minutes. On top of this OCP workloads are able to use plethora of Nutanix capabilites like high availability, compression, erasure coding, etc.