OCP Serverless and CICD
In this lab we will delve into the world of Serverless and CICD with OCP.
We will also see how Nutanix offers solutions that will facilitate serverless offerings with OCP.
Nutanix offers:
- HCI Compute and Storage
- Objects as Container Registry location
- This is where all the newly developed containers images are stored
- OCP nodes runs as virtual machines on Nutanix
- Virtual machines needs volumes as storage
- Virtual machines need compute and networking
- Virtual machines can be deployed and destroyed with easy to use Nutanix APIs facilitating serverless
- Objects as Container Registry location
Serverless
Serverless concepts bridges the gap between developers and infrastructure. A developer should be able to test and deploy applications with tight integration to infrastructure. Serverless concepts allow the following (not limited to):
- Once a developer is aware of infrastructure resources and capacity planning, they should be able to deploy applications without in-depth knowledge of the infrastructure. Infrastructure should be available as a service for developers to consume
- Use infrastructure only when there is a requirement to do so to control spending. If there is no demand for applications, the used infrastructure should be zero or be in a stand-by state to become ready
In this lab, we will be deploy this OCP lab and exposing it internally as application to check whether a developer is able to deploy applications from their source code.
In essence, the lab instruction website is a NodeJS application called Docusaurus.
OCP has Integrated Source to Image S2I capabilities natively and we will use this to demonstrate serverless functionality.
- OCP S2I implementation decides on the best deployment strategy (dockerfile, pre-built container images, etc) without the developer having to worry about this
- OCP will take care of the deployment part in the OCP (kubernetes)
- OCP will also create a route/ingress where the end-users can access the application
Pre-requisites
This lab requires that the OpenShift has access to a container registry to store the application container.
Pipeline generator uses the internal registry image-registry.openshift-image-registry.svc:5000 in the build step by default
Make sure to have the internal or external registry configured. Steps to configure internal registry are documented here
High Level steps
- Install Red Hat OpenShift Pipelines operator from OperatorHub
- Use OCP's Import from Git functionality to get source code
- Build a container
- Upload to OCP image registry
- Deploy application to OCP cluster
- Expose the application and access
Install Red Hat OpenShift Pipelines operator
Browse to you OCP cluster's web UI
https://console-openshift-console.apps.ocpuserXX.ntnxlab.local/Login as kubeadmin or a IDP user
Search for
pipelineskeywordSelect
Red Hat OpenShift PipelinesClick Install

Select latest release
Click Install
Monitor the installation to make sure it is installed without errors
Create Projects and Access
Logon to your OC command line to create projects (namespaces) and necessary access for services accounts.
Projects/namespaces are treated like different deployment environment (dev and stage).
In the bare-metal and virtual machine world, one would create different servers for these deployments. However, we will simulate this by creating different projects/namespaces in OCP cluster.
Logon to UserXX-LinuxToolsVM and connect to OCP cluster
export KUBECONFIGKUBECONFIG=/path/to/kubeconfigCreate our dev and stage projects
oc create ns dev
oc create ns stage
Grant edit role to ServiceAccount group for these projects(namespaces)
oc adm policy add-role-to-group edit system:serviceaccounts -n devoc adm policy add-role-to-group edit system:serviceaccounts -n stageoc adm policy add-role-to-user system:image-puller system:serviceaccounts:stage -n devoc adm policy add-role-to-user system:deployer system:serviceaccounts:dev -n stage
Deploying Application
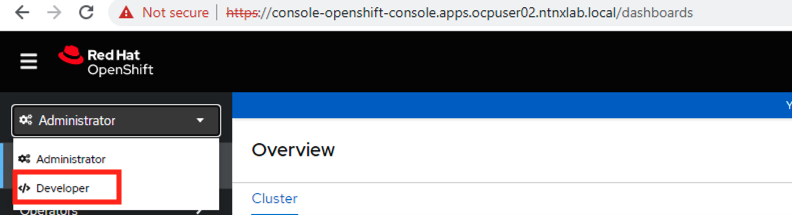
Switch to Developer view
Click on +Add just under Developer
Make sure you are under
devproject
Click on Import from Git
Copy and paste the following url
https://github.com/ariesbabu/ocp-gitp.gitClick on Edit Import Strategy
Choose the following options
- Import strategy - Buider Image
- Buider Image - NodeJS
- Buider Image version -
latest(ok for testing - not great for production) - Build Option - Choose Pipelines from drop down menu
- Target port -
3000 - Create a route - leave checked
- Path - leave blank
- Secure route - unchecked
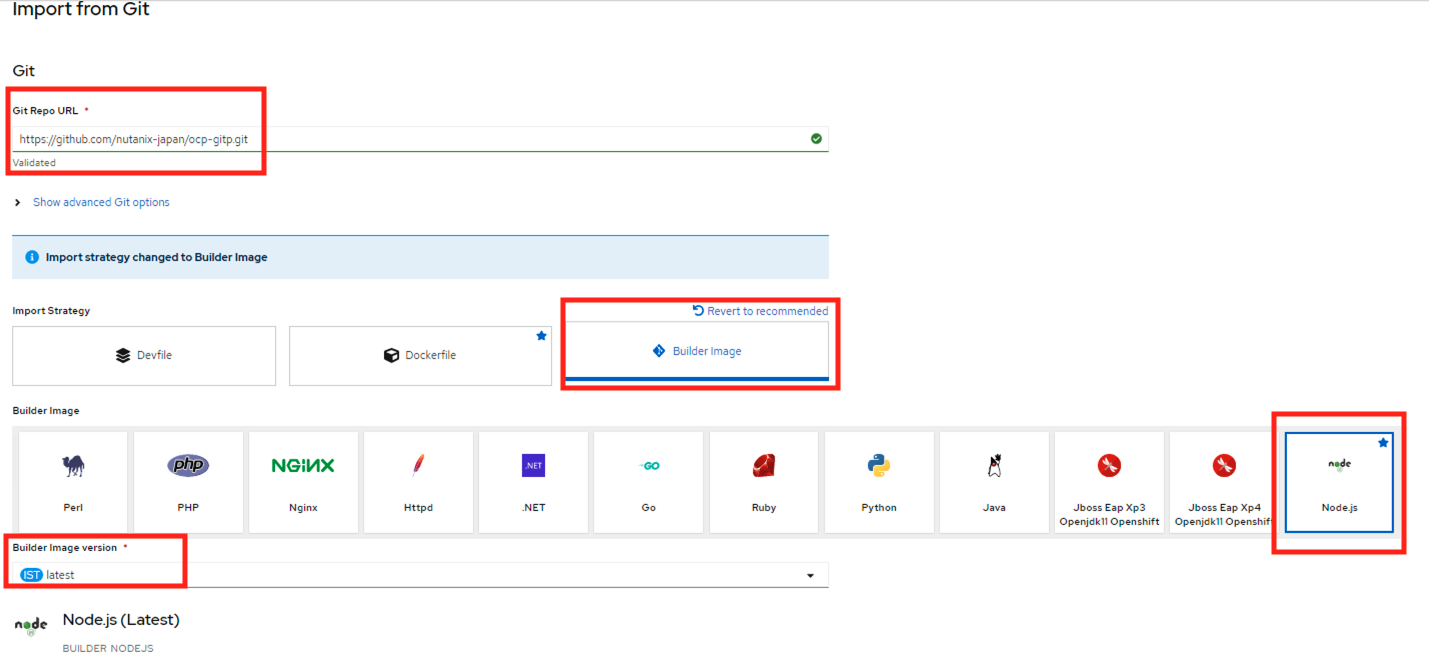
Click on Create button at the end after confirming the options above
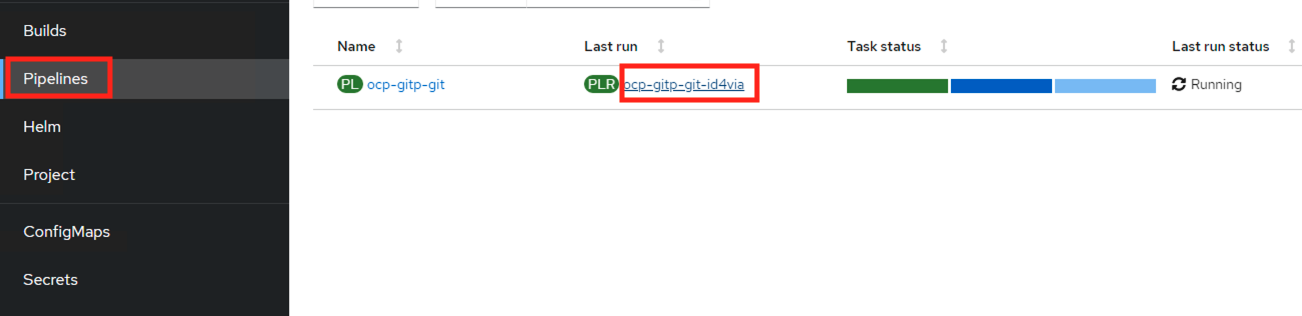
On the left hand side pane, click on Pipelines
Click on Last run pipeline run (PLR) corresponding to your ocp-gitp-git pipeline you created
You can see which step of the pipeline you are at
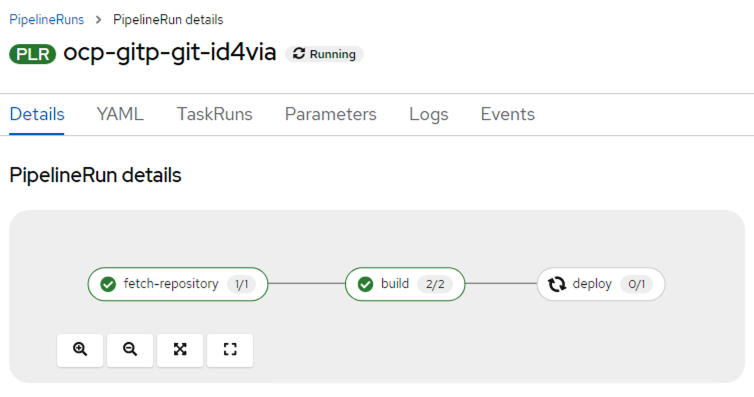
Click on the Logs tab to see detailed logs at any point of the pipeline
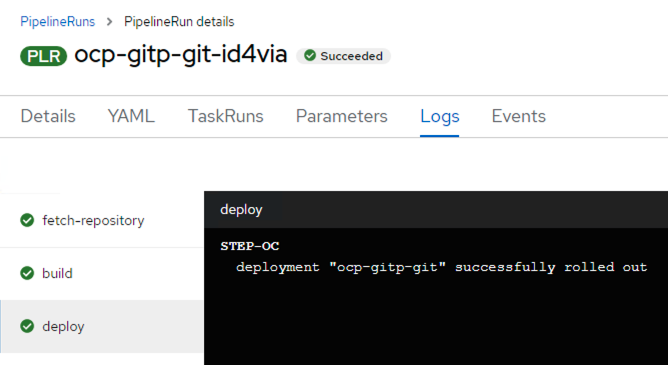
Since our pipeline has successfully rolled out our NodeJS application (our documentation website), let us check out if we are able to access it
Click on Topology option, and click on the URL on your application as shown here, this is a route created by the pipeline for application access
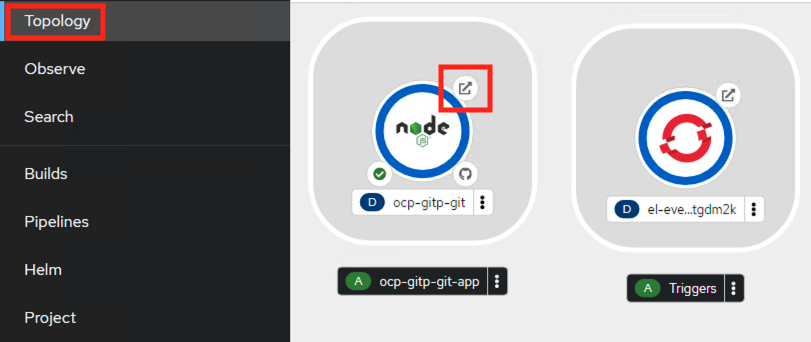
The application should open in a new browser tab
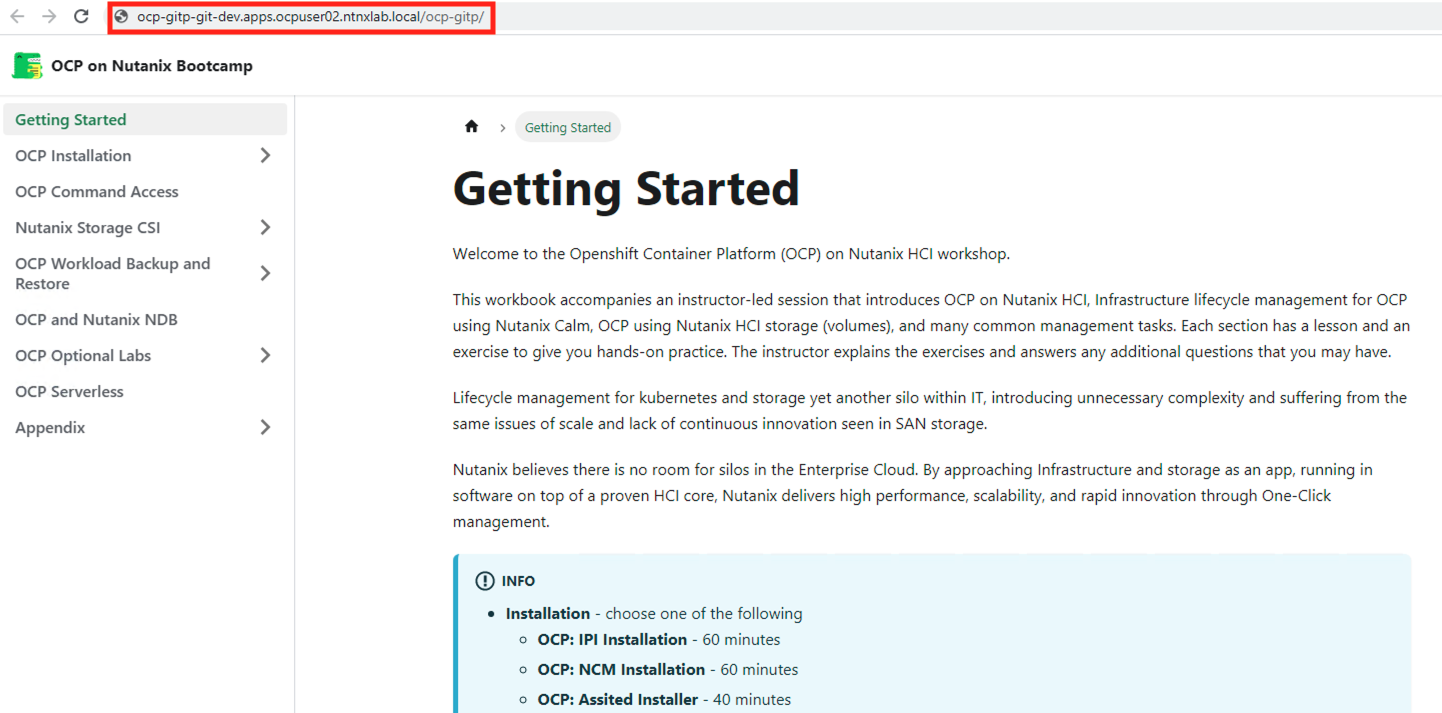 note
noteNote that the documentation site NodeJS application is now hosted on your OCP cluster
http://ocp-gitp-git-dev.apps.user02.ntnxlab.local/Where:
ocp-gitp-git- is your application namedev- is your namespace/project nameocpuser02- is your OCP clusterntnxlab.local- is your domain/ocp-gitp/- is your basePath url
You can note that OCP has combined both serverless and CICD functionality into one single workflow.