
Deploy

Deploying OCP Cluster

This will be simplest part of all, provided you have done everything correctly to this point.

  1. Start the installation of OCP cluster by executing the following

    nohup openshift-install create cluster --log-level=debug &
    Now you can follow the nohup logs to see installation progress
    tail -f nohup.out
  2. A typical installation flow would look like this

    caution

    This steps will take up to 40 minutes.

    Install output - note the access information to the OCP cluster
    openshift-install create cluster
    #
    INFO Consuming Master Machines from target directory
    INFO Consuming OpenShift Install (Manifests) from target directory
    INFO Consuming Common Manifests from target directory
    INFO Consuming Openshift Manifests from target directory
    INFO Consuming Worker Machines from target directory
    INFO Creating infrastructure resources...
    INFO Waiting up to 20m0s (until 8:16AM) for the Kubernetes API at https://api.ocpuser01.ntnxlab.local:6443...
    INFO API v1.24.0+b62823b up
    INFO Waiting up to 30m0s (until 8:27AM) for bootstrapping to complete...
    INFO Destroying the bootstrap resources...
    INFO Waiting up to 40m0s (until 8:49AM) for the cluster at https://api.ocpuser01.ntnxlab.local:6443 to initialize...
    INFO Waiting up to 10m0s (until 8:30AM) for the openshift-console route to be created...
    INFO Install complete!
    INFO To access the cluster as the system:admin user when using 'oc', run
    INFO export KUBECONFIG=/home/ubuntu/auth/kubeconfig
    INFO Access the OpenShift web-console here: https://console-openshift-console.apps.ocpuser01.ntnxlab.local
    INFO Login to the console with user: "kubeadmin", and password: "xxxx-xxxx-xxxx-xxxx"
    INFO Time elapsed: 27m0s
  3. Once the installation is done we can access OCP cluster using the following ways:

    Export your kubeconfig file to env
    export KUBECONFIG=/home/ubuntu/ocpuserXX/auth/kubeconfig # e.g KUBECONFIG=/home/ubuntu/ocpuser01/auth/kubeconfig
    oc get nodes
    ##
    NAME STATUS ROLES AGE VERSION
    ocpuser01-6zlwh-master-0 Ready master 14m v1.24.0+b62823b
    ocpuser01-6zlwh-master-1 Ready master 14m v1.24.0+b62823b
    ocpuser01-6zlwh-master-2 Ready master 14m v1.24.0+b62823b
    ocpuser01-6zlwh-worker-czbn7 Ready worker 14m v1.24.0+b62823b
    ocpuser01-6zlwh-worker-njv66 Ready worker 14m v1.24.0+b62823b
    ocpuser01-6zlwh-worker-mlgbh Ready worker 14m v1.24.0+b62823b
  4. For GUI access, use the kubeadmin credentials listed in the nohup.out file

  5. Add to the hosts file entry on your Mac/PC for accessing OCP UI with the following content:

    10.x.x.x     pc.ntnxlab.local
    10.x.x.x console-openshift-console.apps.ocpuser0X.ntnxlab.local
    10.x.x.x oauth-openshift.apps.ocpuser0X.ntnxlab.local

    From your Mac/PC, open Chrome

    Open the following URL

    https://console-openshift-console.apps.ocpuser0X.ntnxlab.local

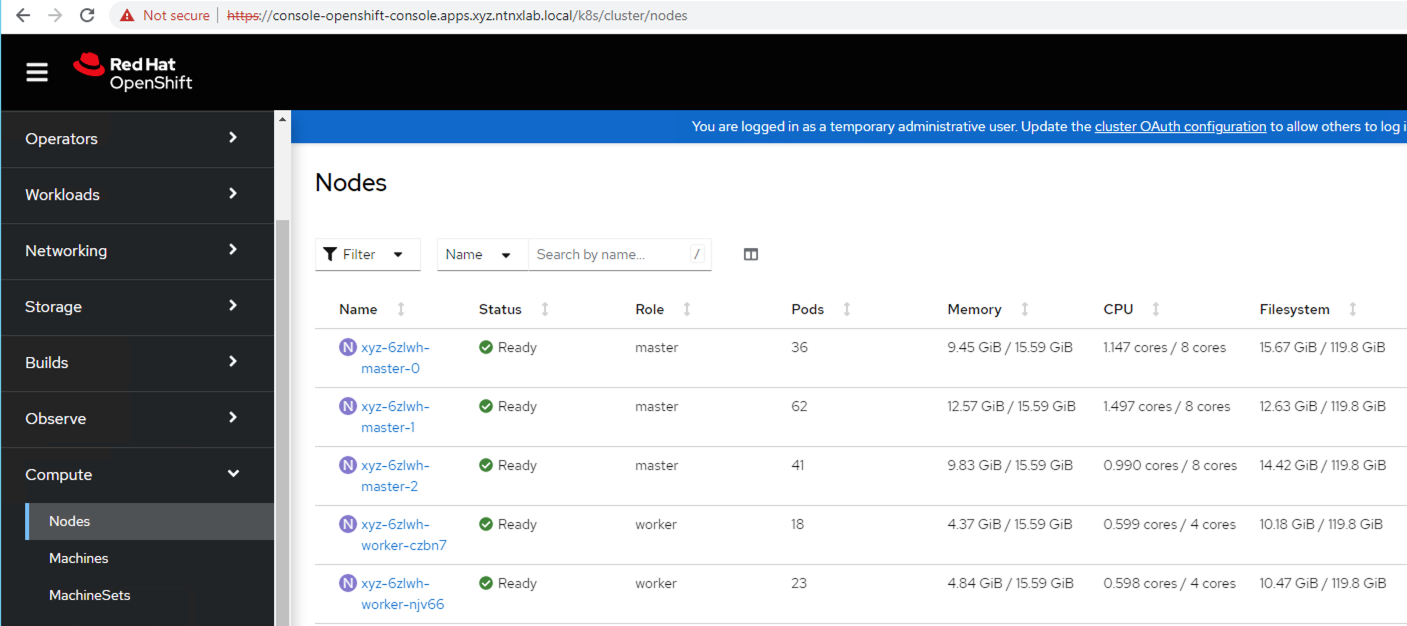
    You have successfully installed OCP using IPI.

note

Now that you have finished OCP IPI install, you can move on to the OCP Command Access section and then on to workloads section.

Cleanup (optional)

DO NOT Cleanup UNLESS ..

Cleaning up (deleting) the OCP cluster should be done only in the following circumstances:

  • You have finished all the labs.
  • You have run into issues deploying OCP cluster and you would like to clean up the resources before redeploying OCP cluster.

Run through the following if you would like to delete the OCP cluster.

  1. In your UserXX-LinuxToolsVM

  2. Change to you working directory that we created before (if not there already)

    cd /home/ubuntu/ocpuser01
  3. Clean up with the following command:

    openshift-install destroy cluster 
    Output
    INFO Starting deletion of Nutanix infrastructure for Openshift cluster "ocpuser01-6zlwh" 
    INFO Virtual machines scheduled to be deleted:
    INFO - ocpuser01-6zlwh-master-2
    INFO - ocpuser01-6zlwh-master-1
    INFO - ocpuser01-6zlwh-master-0
    INFO - ocpuser01-6zlwh-worker-qzslg
    INFO - ocpuser01-6zlwh-worker-xjfk9
    INFO - ocpuser01-6zlwh-worker-mlgbh
    INFO Deleting VM ocpuser01-6zlwh-master-2 with ID d7d5f8ac-6190-4708-93d7-c065f24f658c
    INFO Deleting VM ocpuser01-6zlwh-master-1 with ID 050dca81-be33-4b9f-9868-44853810ea99
    INFO Deleting VM ocpuser01-6zlwh-master-0 with ID 13adfbae-3b22-443e-88e9-e8e58d2be78e
    INFO Deleting VM ocpuser01-6zlwh-worker-qzslg with ID 93a3efc8-cdc6-4df9-a5d5-0ba420e033ab
    INFO Deleting VM ocpuser01-6zlwh-worker-xjfk9 with ID 056f313e-b426-4ec3-a740-2c2ccd8e83ef
    INFO Deleting VM ocpuser01-6zlwh-worker-mlgbh with ID 056f313e-b426-4ef6-a740-2c2ccd8e83vc
    INFO Deleting image "ocpuser01-6zlwh-rhcos" with UUID "3001064e-46ce-4f62-b8d3-116a24eedf55"
    INFO Deleting category value : shared
    INFO Deleting category value : owned
    INFO Deleting category key : kubernetes-io-cluster-ocpuser01-6zlwh
    INFO Time elapsed: 32s

IPI installation method is simple and consistent to deploy as after the pre-requisites are setup once.

Customers can easily deploy as many OCP clusters on Nutanix HCI.