OCP and Nutanix NDB
In this lab we will setup custom micro-service based application with VM based Nutanix Database NDB service.
In recent years, the growth of microservices has lead to use of VM based databases. Although microservices based databases are available, customers are still using VM based databases as a datastore. The following may be the reason for customers using VM based databases (not limited to):
- Customer has majority of databases on VM platform
- Customers DBA team has more expertise with VM based databases
- Cloud based database providers (AWS RDS) with several database engines are used prevalently
- Ease of deployment, scale and security (although security for microservices is improving at an exponential rate)
- Customer's extensive knowledge in providing high availability, disaster recovery and backups for these VM based databases
- Knowledge of implementing security practices for VMs in general
- Customers are using VM based databases and are in the middle of migrating to microservices based databases
- Customers are using a hybrid database environment - both VM based and microservices based databases and have decided to stay this way
Nutanix NDB offers Databases as a service using NDB. Customers can provision hybrid multicloud DBaaS for Microsoft SQL Server, Oracle, PostgreSQL, MongoDB, and MySQL and be able to efficiently manage hundreds to thousands of databases.
Estimated time to complete this lab is 60 minutes.
Fun fact
Pre-requisites for using NDB Deployed Databases
- NDB appliance deployed on the Nutanix cluster
- OCP cluster deployed on the Nutanix cluster - Check the following portions of this guide to create a OCP cluster:
- Networking requirements adhering to OCP and Nutanix
At the moment only Postgres databases are available to be deployed by NDB Operator for OCP. Nutanix will be adding other NDB capable database platforms (MSSQL, MYSQL, Oracle, etc.) incrementally. There are no ETAs at the moment. Please check Nutanix release announcements.
Nutanix provides 24x7x365 support for Postgres along with Postgres Professional. See this Solution Brief for more details.
High Level Overview of NDB and OCP integration
At a very high level we will perform the following steps:
- Install NDB Operator on the OCP cluster
- Deploy a new NDB Postgres database
- Install a custom application on OCP
- Connect application to NDB Postgres database
- Create database schema
- Populate database with data
- Perform tasks at application level
- Verify presence of data in NDB provisioned database
Install NDB Operator on OCP
In this section we will install NDB operator and use yaml files to provision a database. The idea is simulate an environment where developers can create database resources as kubernets manifests.
This way developers can easily integrate VM based databases in their regular microservices based workflow.
Prepare you Linux Tools VM
Logon to your Linux Tools VM using ubuntu user name and password on the browser
Can't find the Linux Tools VM?If you don't have a Linux Tools VM deployed on your HPOC cluster, follow instructions in Appendix > Linux Tools VM page to deploy one.
Create a new directory in the home
mkdir $HOME/ocpuserXX/ndb
cd $HOME/ocpuserXX/ndb
Depending on you access to
kubeconfigfile or kubeadmin password, logon to the OCP cluster- kubeconfig
- kubeadmin
Export your kubeconfig file to envexport KUBECONFIG=/home/ubuntu/ocpuserXX/auth/kubeconfigMake sure to use your passwordoc login -u kubeadmin -p xxxxx-xxxxx-xxxxx-xxxxxMake sure your OCP cluster is accessible
Ensure that you are getting outputoc get nodesInstall latest version of Cert Manager as a pre-requisite for NDB Operator
oc apply -f https://github.com/cert-manager/cert-manager/releases/download/v1.13.1/cert-manager.yamlMake sure all Cert Manager services are up and running
oc get po -n cert-manager -w
Install the NDB Operator for OCP
Add Nutanix's Helm repo
helm repo add nutanix https://nutanix.github.io/helm/Install NDB Operator using Helm
helm install ndb-operator nutanix/ndb-operator --version 0.5.1 -n ndb-operator --create-namespaceOutputNAME: ndb-operator
LAST DEPLOYED: Mon Dec 19 22:58:45 2022
NAMESPACE: ndb-operator
STATUS: deployed # << Ensure the deployed state
REVISION: 1
TEST SUITE: NoneinfoThe operator will be deployed in
ndb-operatornamespace/project.Ensure all the resources are healthy in the
ndb-operatornamespace/project.oc get all -n ndb-operatorOutput#
NAME READY STATUS RESTARTS AGE
pod/ndb-operator-controller-manager-77fcb496d5-7qcfc 2/2 Running 0 2m16s
NAME TYPE CLUSTER-IP EXTERNAL-IP PORT(S) AGE
service/ndb-operator-controller-manager-metrics-service ClusterIP 172.30.244.194 <none> 8443/TCP 2m16s
NAME READY UP-TO-DATE AVAILABLE AGE
deployment.apps/ndb-operator-controller-manager 1/1 1 1 2m16s
NAME DESIRED CURRENT READY AGE
replicaset.apps/ndb-operator-controller-manager-77fcb496d5 1 1 1 2m16stipYou can follow the logs of the
ndb-operator-controller-managerdeploymentto see the activities of the NDB Operator.oc logs -f deployment.apps/ndb-operator-controller-manager -n ndb-operator
Create NDB Postgres DB
In this section we will create a Postgres database using NDB Operator.
High Level Steps
- NDB operator will communicate with NDB server with a create database request
- NDB server will create the Postgres database VM (instance) and postgres database
- NDB server will respond to NDB Operator with the result of the requested operation
Prepare Secrets for your Database Server and Database
Create a new OCP project
oc new-project ndbCreate a secret for NDB Operator to access NDB server
cat << EOF > your-ndb-secret.yaml
apiVersion: v1
kind: Secret
metadata:
  name: your-ndb-secret
type: Opaque
stringData:
  username: admin
  password: _ndb_admin_password
EOF
Edit the manifest with your NDB server credentials and save it
vi your-ndb-secret.yamlApply the manifest to create NDB server credentials secret
oc apply -f your-ndb-secret.yamlCreate a secret with credentials (password and ssh public key) for the new Postgres VM that you will be provisioning.
SSH key is a requirement. This must be included to authenticate to your NDB deployed VM.
Databaseresource will fail to deploy if ssh-public-key is not included.cat << EOF > your-db-secret.yaml
apiVersion: v1
kind: Secret
metadata:
name: your-db-secret
type: Opaque
stringData:
password: postgres_password # << Do not change this for now
ssh_public_key: ssh-rsa AAAAB3NzaC1yc2EAAAADAQABAAABAQ.... # << this must be present
EOFNo SSH-PUBLIC-KEY?
tipIf you do not have a SSH-PUBLIC-KEY, use the
ssh-keygencommand on your Linux Tools VM to create a ssh key pairRemember to keep it safe somewhere.
ssh-keygen -t rsa -b 2048 -f ~/.ssh/for_ndb   # << accept all default answers
ls -l ~/.ssh/
## Output here
~/.ssh/for_ndb.pub  # << use this public key in the your-db-secret manifest
~/.ssh/for_ndb      # << use this private key to logon to the NDB deployed database server
vi your-db-secret.yaml
oc apply -f your-db-secret.yaml
Get NDB Cluster's UUID
We will use curl command to get the Era's cluster UUID in this section.
Logon to the Linux Tools VM using your credentials
Set the env for NDB VMs IP address
- Template command
- Sample command
NDB_IP=_your_ndb_vm_ip
echo $NDB_IPNDB_IP=10.42.12.18
10.42.12.18Execute the following command to get Era cluster's UUID. We will use this in our database configuration file in the next section.
- Template command
- Sample command
NDB_UUID="$(curl -X GET -u admin -k https://$NDB_IP/era/v0.9/clusters | jq '.[0].id')"
echo $NDB_UUIDNDB_UUID="$(curl -X GET -u admin -k https://10.42.12.18/era/v0.9/clusters | jq '.[0].id')"
"eafdb83c-e512-46ce-8d7d-6859dc170272"Sample execution and outputcurl -X GET -u admin -k https://10.42.12.108/era/v0.9/clusters | jq '.[0].id'
Enter host password for user 'admin': # << Enter your Era server's password here
"eafdb83c-e512-46ce-8d7d-6859dc170272" # << This uuid will be different for all Era clusters.
- Record the Era server's cluster UUID
Create NDB Compute Profile
Create a NDB compute profile that can be used for our Postgres database
In NDB > Go to Profiles > Compute Profile
Create a new compute profile
- Name - DEFAULT_OOB_SMALL_COMPUTE
- CPUS - 4
- CORE_PER_CPU - 2
- MEMORY - 8
Create Postgres Database using the NDB Operator
Create a
NDBServerserver resource by using the following manifest:cat << EOF > ndbserver.yaml
apiVersion: ndb.nutanix.com/v1alpha1
kind: NDBServer
metadata:
labels:
app.kubernetes.io/name: ndbserver
app.kubernetes.io/instance: ndbserver
app.kubernetes.io/part-of: ndb-operator
app.kubernetes.io/managed-by: kustomize
app.kubernetes.io/created-by: ndb-operator
name: ndb
spec:
# Name of the secret that holds the credentials for NDB: username, password and ca_certificate created earlier
credentialSecret: your-ndb-secret
# NDB Server's API URL
server: https://$NDB_IP:8443/era/v0.9
# Set to true to skip SSL certificate validation, should be false if ca_certificate is provided in the credential secret.
skipCertificateVerification: true
EOFConnect the OCP cluster to your NDB server by applying the manifest you created
oc apply -f ndbserver.yamlChoose a name for your DB server
MY_DB_SERVER_NAME=ocpuserXX # e.g ocpuser01
echo $MY_DB_SERVER_NAME
Create a Database resource by using the following manifest
cat << EOF > database.yaml
apiVersion: ndb.nutanix.com/v1alpha1
kind: Database
metadata:
# This name that will be used within the kubernetes cluster
  name: dbforflower                                     # << This will be our kubernetes database object's name
spec:
  # Name of the NDBServer resource created earlier
  ndbRef: ndb
  isClone: false
  # Database instance specific details (that is to be provisioned)
  databaseInstance:
    clusterId: $NDB_UUID
    # Example
    # clusterId: "a913265b-377c-44cf-8984-d049ade62585"
    # The database instance name on NDB
    # profiles:
    #   software:
    #     name: "POSTGRES_15.6_ROCKY_LINUX_8_OOB"
    name: "$MY_DB_SERVER_NAME"                        # << change this to your ocpuser name
    # Example
    #name: "pgserver_ocpuser01"
    # Names of the databases on that instance
    databaseNames:
      - predictiondb                                  # << this will be our database name
    # Credentials secret name for NDB installation
    # data: password, ssh_public_key
    credentialSecret: your-db-secret
    size: 10
    timezone: "UTC"
    type: postgres
EOF
Edit the
database.yamlfile to populate with your environment detailsvi database.yamlCreate the NDB
Databaseresource ndboc apply -f database.yamlCheck the status of the deployment
oc get databaseOutput - you will see provisioning statusNAME IP ADDRESS STATUS TYPE
dbforflower CREATINGYou can also track the progress of the database deployment by looking at the
ndb-operator-controller-managerpod logs inndb-operator-systemnamespaceMake sure to use your pod nameoc logs -f deployment.apps/ndb-operator-controller-manager -n ndb-operatorYou can also login to the NDB web page to see the progress.
In NDB UI, Select Menu Operations
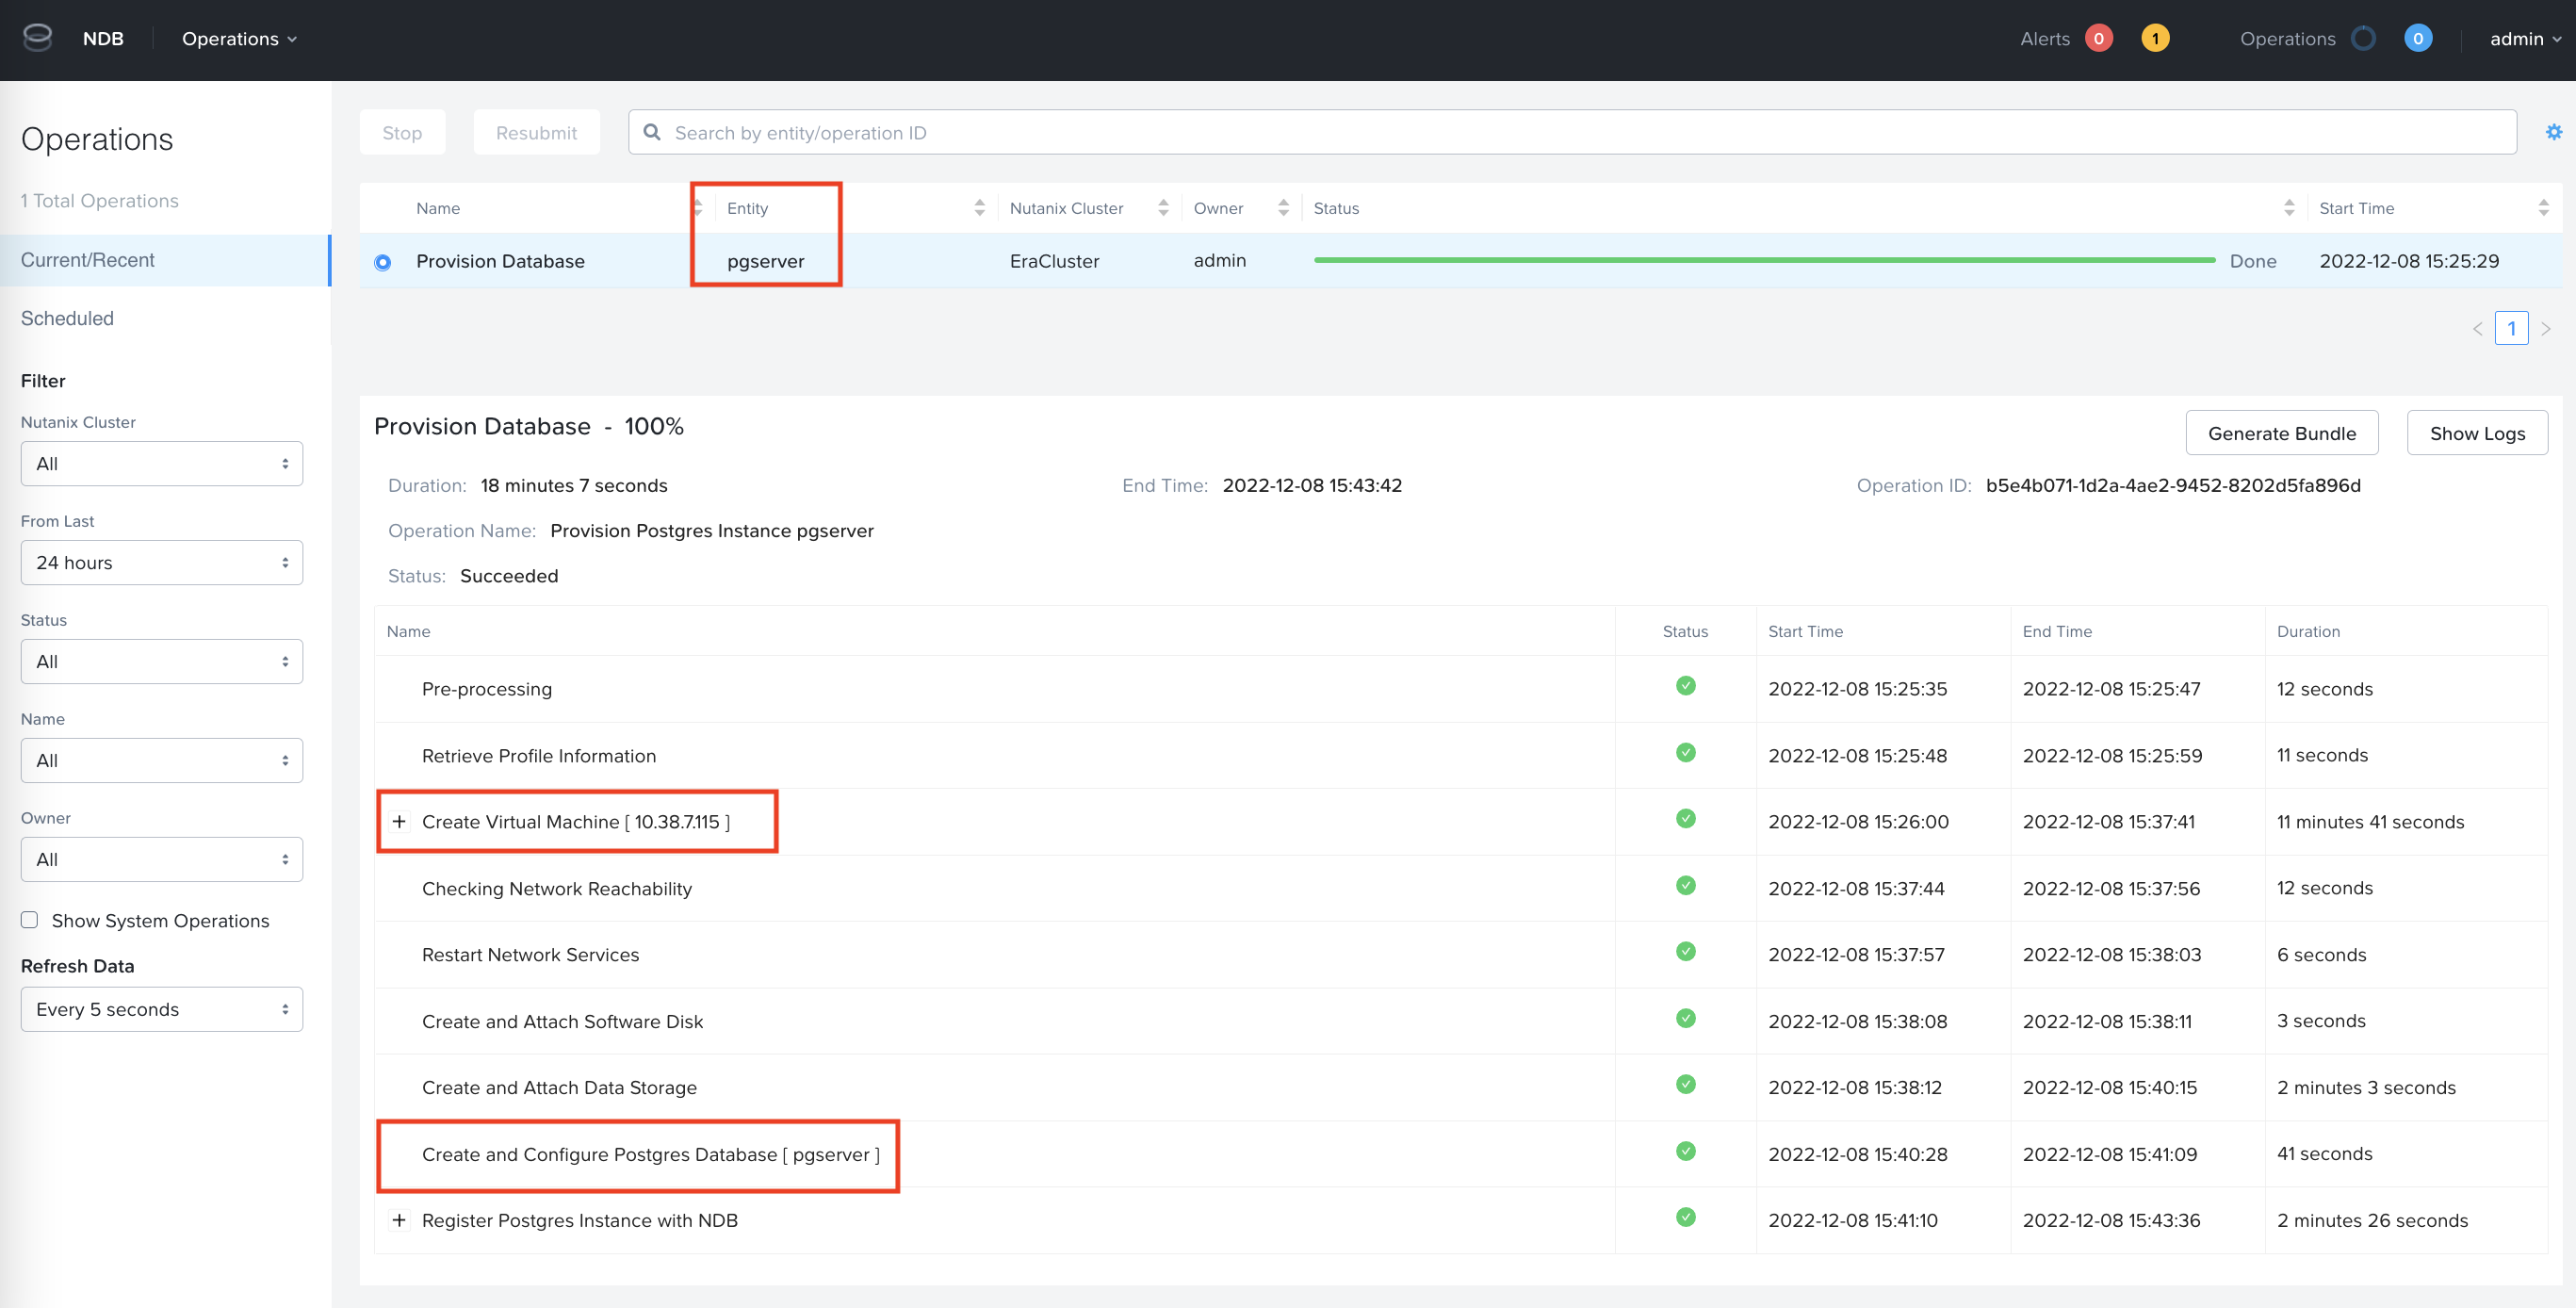
It will take about 20 minutes to provision the pgserver database server and predictiondb database.
Refer to the following document for other database creation option with NDB Options
Check Database Connectivity
Check the status of NDB deployed database in OCP
oc get databaseOutput - note the READY status and the IP address of the database VMNAME IP ADDRESS STATUS TYPE
dbforflower 10.38.13.45 READY postgresNDB Operator also creates a service and an endpoint(IP+Port) for you to access the database server
oc get service,epOutput - note the Cluster IP, endpoint's external IP and port numberNAME TYPE CLUSTER-IP EXTERNAL-IP PORT(S) AGE
service/dbforflower-svc ClusterIP 172.30.188.239 <none> 80/TCP 73s
NAME ENDPOINTS AGE
endpoints/dbforflower-svc 10.38.13.45:5432 73s # << This is IP of the PostGres server deployed by NDBThe database is now available as an
ClusterIPresource on port80service to other workloads.We just need to use the
ClusterIPof the database service to connect from the front end application pod.Check if you are able to connect to you database. We will do this by deploying a standalone postgres pod.
Set SCC to run PSQL podoc adm policy add-scc-to-user anyuid -z defaultDeploy the PSQL podcat << EOF | oc apply -f -
apiVersion: v1
kind: Pod
metadata:
name: psql
spec:
restartPolicy: Never
containers:
- name: psql
image: alpine/psql
command: ["/bin/sh", "-c", "echo 'Pod is running' && sleep 7200"]
env:
- name: POSTGRES_PASSWORD
value: postgres_password
securityContext:
allowPrivilegeEscalation: true
EOFLogin to the PSQL pod and connect to the database serveroc exec -it psql -- /bin/shInside the PSQL pod, logon to the predictiondb databasepsql -h dbforflower-svc -p 80 -U postgres -d predictiondbEnter the password you used in your-db-secret.yaml file# psql -h dbforflower-svc -p 80 -U postgres -d predictiondb
Password for user postgres:
psql (9.4.5, server 10.4)
WARNING: psql major version 9.4, server major version 10.4.
Some psql features might not work.
Type "help" for help.
predictiondb=#Run \du command to list the userspredictiondb=# \du
List of roles
Role name | Attributes | Member of
----------------------+------------------------------------------------+--------------------------------------------------------------
pg_monitor | Cannot login | {pg_read_all_settings,pg_read_all_stats,pg_stat_scan_tables}
pg_read_all_settings | Cannot login | {}
pg_read_all_stats | Cannot login | {}
pg_signal_backend | Cannot login | {}
pg_stat_scan_tables | Cannot login | {}
postgres | Superuser, Create role, Create DB, Replication | {}
You are able to connect to the database without leaving the OCP command line environment. This is what most developers and devops engineers will have access to, so they can deploy applications.
Installing a Custom Three-layer Application
In this section we will install a three-layer application (front end, back end and database) to showcase the value of NDB Operator to a customer.
All ideas for this three-layer this application come from this blog.
We have only modified the implementation to suit deployment in a OCP cluster with NDB deployed Postgres database.
Create Database Schema and Data
Apply the application secrets manifest
oc apply -f https://raw.githubusercontent.com/nutanix-japan/ocp-gitp/main/docs/ocp_ndb/k8s/app-secrets.yamlDownload and edit the configmap to match your database service name and port number (if you used a different database name in your
ndb.yamlmanifest)curl -LO https://raw.githubusercontent.com/nutanix-japan/ocp-gitp/main/docs/ocp_ndb/k8s/app-variables.yamlEdit you
app-variables.yamlfile to match your DB_HOST service name and DB_PORT port number- Template file
- Sample file
apiVersion: v1
kind: ConfigMap
metadata:
   name: app-variables
data:
   #env variables for the postgres component
   POSTGRES_USER: postgres_user
   POSTGRES_DB: predictiondb

   #env variables for the backend component
   DJANGO_ENV: development
   DEBUG: "1"
   SECRET_KEY: secretsecretsecretsecretsecret
   DJANGO_ALLOWED_HOSTS: "*"
   DJANGO_ADMIN_USER: admin
   DJANGO_ADMIN_EMAIL: "admin@example.com"

   #db server components
   DATABASE: postgres
   DB_ENGINE: "django.db.backends.postgresql"
   DB_DATABASE: predictiondb
   DB_USER: postgres
   DB_HOST: <your DB service>                  #  << Match your database service
   DB_PORT: <your DB port>                     #  << Match your database service's port number
apiVersion: v1
kind: ConfigMap
metadata:
name: app-variables
data:
#env variables for the postgres component
POSTGRES_USER: postgres_user
POSTGRES_DB: predictiondb
#env variables for the backend component
DJANGO_ENV: development
DEBUG: "1"
SECRET_KEY: secretsecretsecretsecretsecret
DJANGO_ALLOWED_HOSTS: "*"
DJANGO_ADMIN_USER: admin
DJANGO_ADMIN_EMAIL: "admin@example.com"
#db server components
DATABASE: postgres
DB_ENGINE: "django.db.backends.postgresql"
DB_DATABASE: predictiondb
DB_USER: postgres
DB_HOST: dbforflower-svc
DB_PORT: "80"
After making sure that your database service name and port number matches, apply the configmap manifest
oc apply -f app-variables.yamlRun this job to populate your database with schema and data
oc apply -f https://raw.githubusercontent.com/nutanix-japan/ocp-gitp/main/docs/ocp_ndb/k8s/django-job.yamlMonitor the job to make sure it has completed
oc get job django-job -wOutput# oc get job -w
NAME COMPLETIONS DURATION AGE
django-job 0/1 14s 15s
django-job 0/1 14s 15s
django-job 0/1 17s 18s
django-job 1/1 19s 20s # << Wait for completionYou can analyse the logs to make sure the job has completed without any issues
Analyse the pod logs - your pod name will be differentoc logs django-job-cmcxkYou must see migration jobs runnig - ignore warningsRunning migrations:
Applying contenttypes.0001_initial... OK
Applying auth.0001_initial... OK
Applying admin.0001_initial... OK
Applying admin.0002_logentry_remove_auto_add... OK
Applying admin.0003_logentry_add_action_flag_choices... OK
Applying contenttypes.0002_remove_content_type_name... OK
Applying auth.0002_alter_permission_name_max_length... OK
Applying auth.0003_alter_user_email_max_length... OK
Applying auth.0004_alter_user_username_opts... OK
Applying auth.0005_alter_user_last_login_null... OK
Applying auth.0006_require_contenttypes_0002... OK
Applying auth.0007_alter_validators_add_error_messages... OK
Applying auth.0008_alter_user_username_max_length... OK
Applying auth.0009_alter_user_last_name_max_length... OK
Applying auth.0010_alter_group_name_max_length... OK
Applying auth.0011_update_proxy_permissions... OK
Applying auth.0012_alter_user_first_name_max_length... OK
Applying authtoken.0001_initial... OK
Applying authtoken.0002_auto_20160226_1747... OK
Applying sessions.0001_initial... OKwhat if my job fails?You would have to troubleshoot.
Delete your job, change any references in app_variables config map that may have been wrong, and re-run the job.
oc delete -f django-job.yaml
oc apply -f django-job
oc get job django-job -o json | oc replace --force -f -
Log back into the database to check if there are new tables
Login to the pod and connect to database serveroc exec -it psql -- /bin/shInside the Postgres pod, logon to the predictiondb databasepsql -h dbforflower-svc -p 80 -U postgres -d predictiondbEnter postgres_password as the password# psql -h dbforflower-svc -p 80 -U postgres -d predictiondb
Password for user postgres:
psql (9.4.5, server 10.4)
WARNING: psql major version 9.4, server major version 10.4.
Some psql features might not work.
Type "help" for help.
predictiondb=#You should see 11 tables createdpredictiondb=# \dt
List of relations
Schema | Name | Type | Owner
--------+----------------------------+-------+----------
public | auth_group | table | postgres
public | auth_group_permissions | table | postgres
public | auth_permission | table | postgres
public | auth_user | table | postgres
public | auth_user_groups | table | postgres
public | auth_user_user_permissions | table | postgres
public | authtoken_token | table | postgres
public | django_admin_log | table | postgres
public | django_content_type | table | postgres
public | django_migrations | table | postgres
public | django_session | table | postgres
(11 rows)
Install Front End and Back End applications
Run the following commands to create the front end and back end applications
oc apply -f https://raw.githubusercontent.com/nutanix-japan/ocp-gitp/main/docs/ocp_ndb/k8s/django-deployment.yaml
oc apply -f https://raw.githubusercontent.com/nutanix-japan/ocp-gitp/main/docs/ocp_ndb/k8s/react-deployment.yaml
Output - you will see deployments and services createddeployment.apps/django-deployment created
service/django-cluster-ip-service created
#
deployment.apps/react-deployment created
service/react-cluster-ip-service createdMake sure all the pods are running
Make sure all pods are runningoc get poOutputoc get po
NAME READY STATUS RESTARTS AGE
django-deployment-5b96897c59-cqhmp 1/1 Running 0 2m15s
django-deployment-5b96897c59-m927z 1/1 Running 0 2m15s
django-job-sbctr 0/1 Completed 0 28m
psql 1/1 Running 0 114m
react-deployment-cdff5fdbf-28mnq 1/1 Running 0 2m13s
react-deployment-cdff5fdbf-5dhm5 1/1 Running 0 2m13s
Create Routes to Access the Application
We will need to create routes to access the front end and back end applications.
You can access the application through the OCP Routes.
Download the routes file
curl -LO https://raw.githubusercontent.com/nutanix-japan/ocp-gitp/main/docs/ocp_ndb/k8s/routes.yamlChange the URL in the downloaded file to suit OCP cluster name and your domain.
OCP Cluster Name - ocpuserXX (change to your OCP cluster name)
Domain - ntnxlab.local
Using
sedcommand this can be done in a single command- Template command
- Sample command
sed -i 's/ROUTE_HOST/flower.apps. <ocpuserXX> .ntnxlab.local/g' routes.yamlsed -i 's/ROUTE_HOST/flower.apps.ocpuser01.ntnxlab.local/g' routes.yamlCreate the routes
oc apply -f routes.yamlCheck the routesoc get routes | awk '{print $1,$2,$3}'OutputNAME HOST/PORT PATH
route-path-a flower.apps.ocpuserXX.ntnxlab.local /
route-path-b flower.apps.ocpuserXX.ntnxlab.local /admin
route-path-c flower.apps.ocpuserXX.ntnxlab.local /api
route-path-d flower.apps.ocpuserXX.ntnxlab.local /static/admin/
route-path-e flower.apps.ocpuserXX.ntnxlab.local /static/rest_framework/
route-path-f flower.apps.ocpuserXX.ntnxlab.local /static/
route-path-g flower.apps.ocpuserXX.ntnxlab.local /media/
Testing Front End React Application
Add to the hosts file entry on your Mac/PC for accessing OCP UI with the following content:
- Template Hosts File
- Example Hosts File
10.x.x.x       pc.ntnxlab.local
10.x.x.x       console-openshift-console.apps.ocpuser0X.ntnxlab.local
10.x.x.x       oauth-openshift.apps.ocpuser0X.ntnxlab.local
10.x.x.x       k10-route-kasten-io.apps.ocpuser0X.ntnxlab.local
10.x.x.x       wordpress-default.apps.ocpuser0X.ntnxlab.local
10.x.x.x flower.apps.ocpuser0X.ntnxlab.local10.42.18.7 pc.ntnxlab.local
10.38.18.220 console-openshift-console.apps.ocpuser01.ntnxlab.local
10.38.18.220 oauth-openshift.apps.ocpuser01.ntnxlab.local
10.38.18.220 k10-route-kasten-io.apps.ocpuser01.ntnxlab.local
10.38.18.220 wordpress-default.apps.ocpuser0X.ntnxlab.local
10.38.18.220 flower.apps.ocpuser01.ntnxlab.local
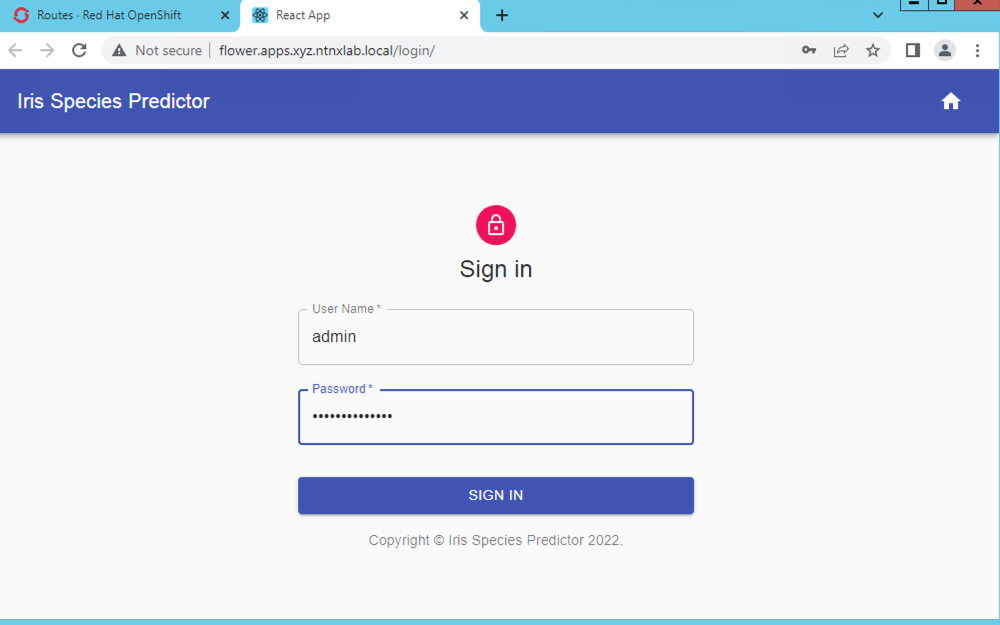
Open the following URL in Chrome browser to access the Front End React application
http://flower.apps.ocpuserXX.ntnxlab.local/- Template URL
- Sample URL
http://flower.apps.ocpuserXX.ntnxlab.local/http://flower.apps.ocpuser01.ntnxlab.local/Enter the following credentials and click on SIGN IN
Username - admin
Password - admin_password
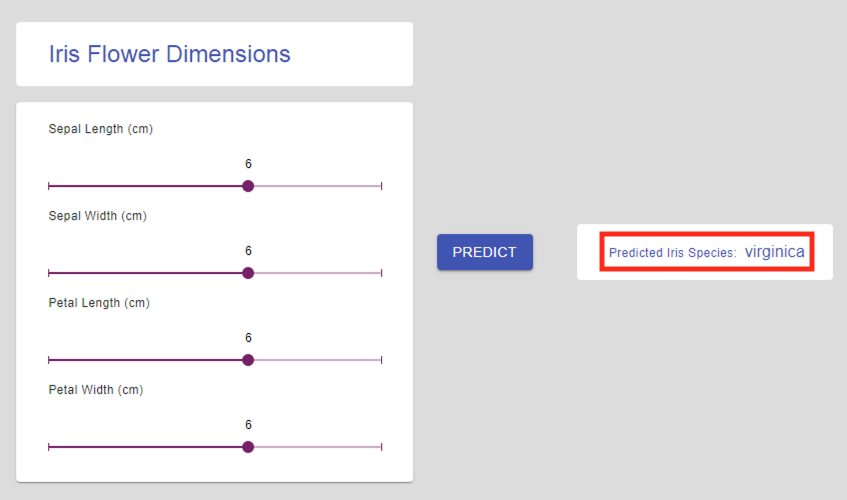
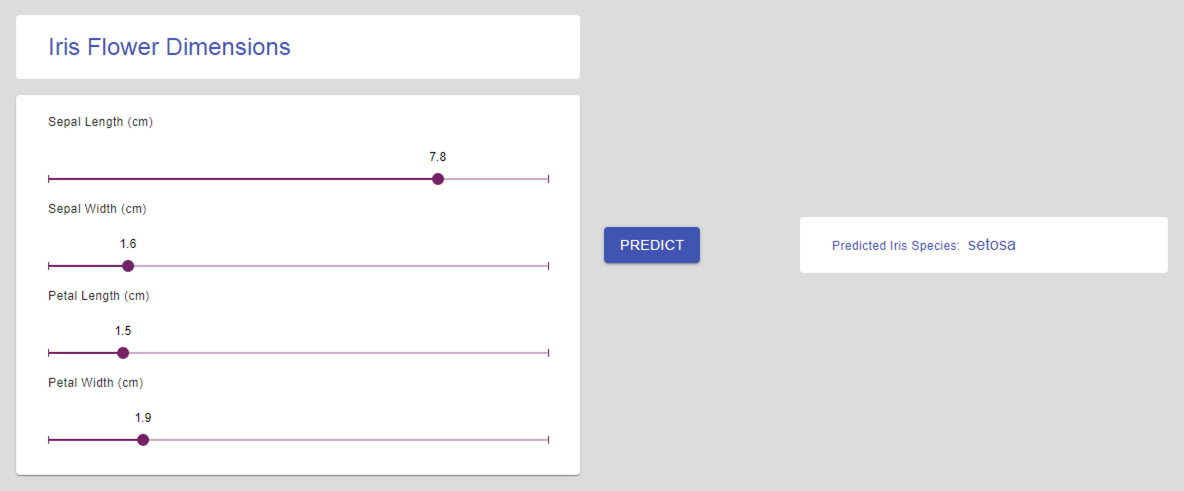
Move the sliders across and click on Predict to get flower names based on their physical attributes
Now that we have finished testing the front end React application, let's move on to testing back end Django application.
Testing Back End Django Application
Django application is used to manage users that will access and manage the front end React application.
We will create a new user in the Django application which we will then use in authenticating to front end React application.
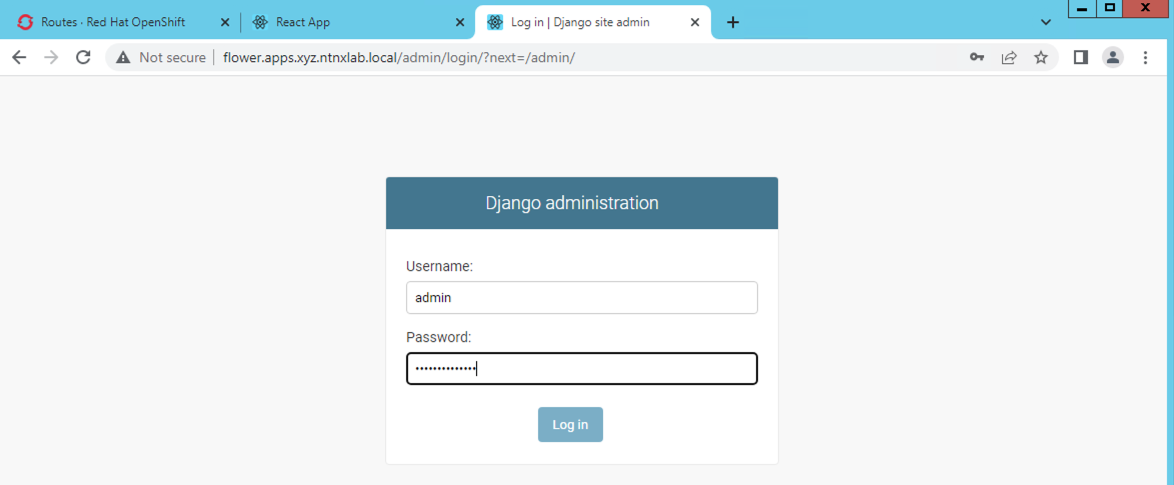
Open the following URL in Chrome browser to access the Front End React application
http://flower.apps.ocpuserXX.ntnxlab.local/adminEnter the following credentials and click on SIGN IN
Username - admin
Password - admin_password
Click on + Add to add users
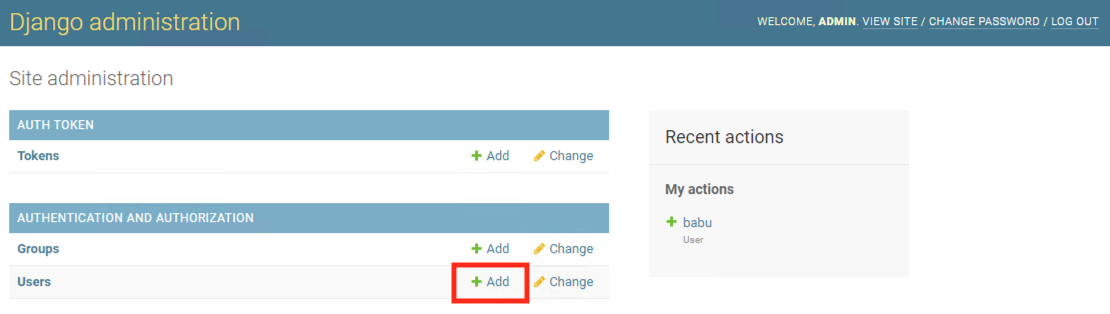
Enter the following details:
Username - Your-Initials-user (e.g. xyz-user)
Password - password of your choice (make sure to remember this)
Password confirmation - re-enter the password of your choice
Click on SAVE
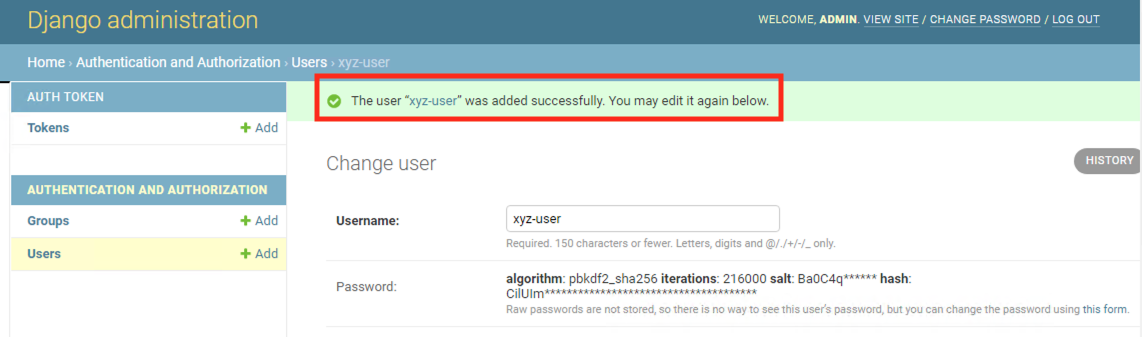
Check the confirmation message
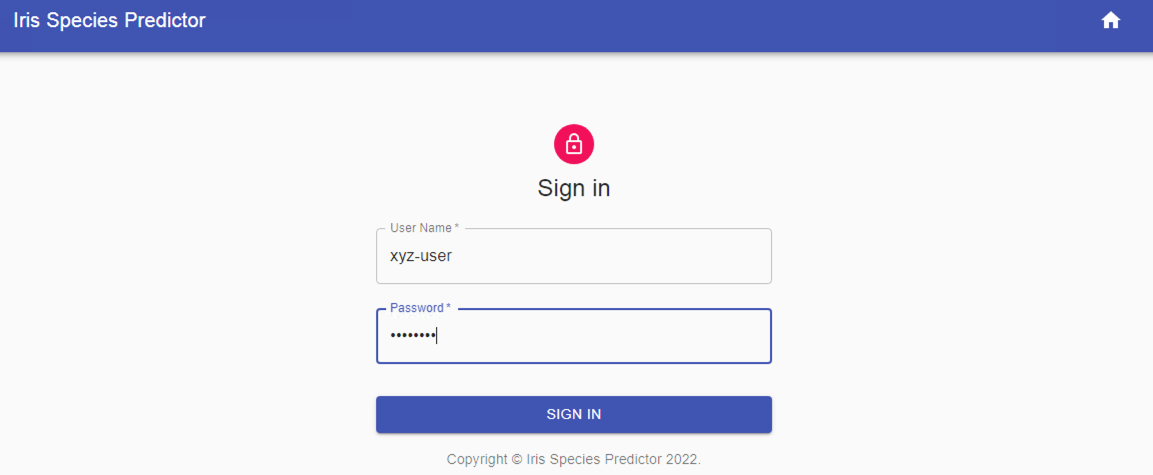
Return to front end React application and test the new credentials.
Check if you are able to login with the newly created credentials. Play around with the flower name prediction AI application and have some fun.
http://flower.apps.ocpuserXX.ntnxlab.local/adminUsername - Your-Initials-user (e.g. xyz-user)
Password - password of your choice from previous step
Checking Postgres Database Data
In this section we will confirm that the new user we created in from the back end Django app is present in the database
Log back into the database to check if there are new users
Login to the psql pod and connect to database serveroc exec -it psql -- /bin/shInside the Postgres pod, logon to the predictiondb databasepsql -h dbforflower-svc -p 80 -U postgres -d predictiondbEnter postgres_password as the password# psql -h dbforflower-svc -p 80 -U postgres -d predictiondb
Password for user postgres:
psql (9.4.5, server 10.4)
WARNING: psql major version 9.4, server major version 10.4.
Some psql features might not work.
Type "help" for help.
predictiondb=#Execute the following query
SELECT username, last_login FROM auth_user;Output of querypredictiondb=# SELECT username, last_login FROM auth_user;
username | last_login
----------+-------------------------------
admin | 2022-12-14 01:38:41.480801+00
xyz-user | 2022-12-14 01:38:53.474404+00 # << This is your new user
(2 rows)
This proves that all data is present in the datastore (Postgres in a VM deployed by NDB) of the application.
Takeaways
- NDB Operator provides ease of use for developers, DevOps engineers, administrators to deploy and use VM based databases without leaving the OCP (kubernetes) ecosystem.
- Deploying databases is as simple as creating a yaml manifest file
- NDB deployed databases are available as a kubernetes
servicefor other microservices in the ecosystem to connect to