OCP: Deploy OCP Infrastructure
In this section we will deploy a OCP cluster using Nutanix Calm.
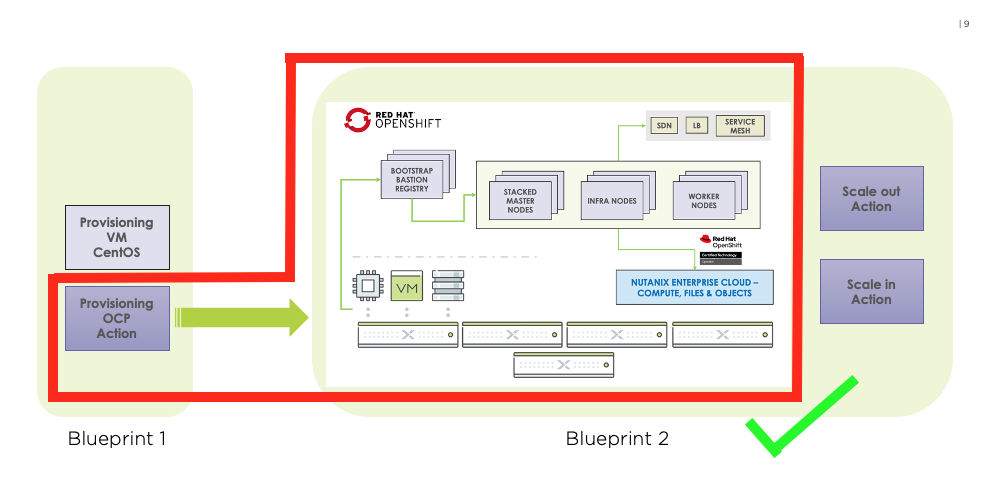
As discussed in the previous section about the Calm blueprints,
- Blueprint 1 (ocpuserXX_OCP_Prov_VM) - provisions a OCP provisioning VM with Calm action to deploy OCP
- Blueprint 2 (ocpuserXX_OCP_Master_Worker) - is called by a Calm/NCM action in
Blueprint 1with all the necessary information thatBlueprint 2needs to run
Since we successfully setup OCP provisioning VM, we have to do the following to proceed:
- Configure OCP VM Blueprint for environment information
- Call the
Deploy OCPaction in Blueprint 1 to deploy OCP cluster
Configuring OCP VM Blueprint
In this section we will configure the environment for the OCP VM blueprint to run. This will include the following:
- Credentials (SSH Private Key) for the services
- Confirming OCP DNS endpoint for the services
- NICs are auto selected during execution
Calm automatically assigns endpoint to Calm Actions, as endpoint is created in your previous labs Calm endpoint section.
It is important for you to confirm endpoints for those Calm Actions in the lab.
In Prism Central > Services > Calm
Click on Blueprints
We need to configure network and credentials for the blueprint so it can be deployed in your HPOC/SPOC.
Select your Provisioning VM
ocpuserXX_OCP_Master_WorkerblueprintClick on Credentials (next to Save)
Copy the same Private Key that you generated from the previous section and paste the generated primary key in the blueprints credential called CRED
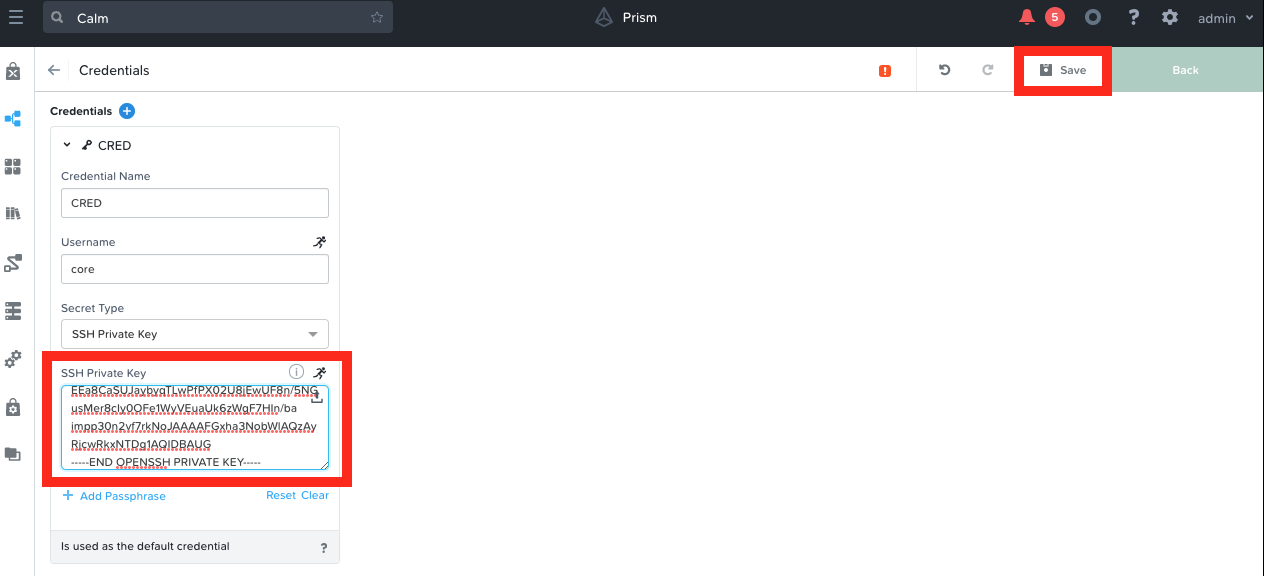
Click on Save
Configure Nutanix Cluster for OCP VMs
We will configure the cluster on which each of the OCP VM (Calm Services) should be hosted.
Select the Worker service
Under VM tab, choose your assigned cluster PHX-POCXXX
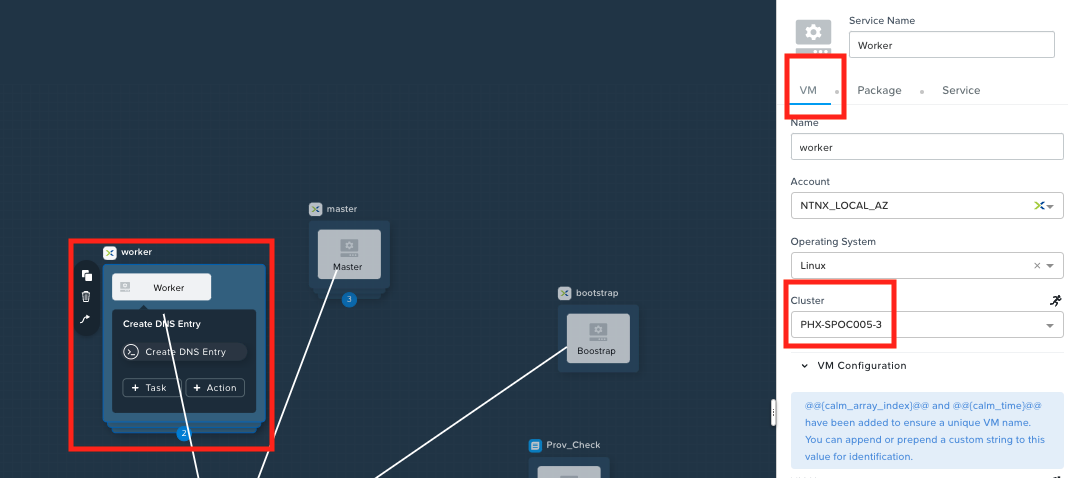
Repeat this for Master, LB_DNS and bootstrap VMs to assign clusters for them
Click on Back to return to the blueprints main window
Configure Endpoints for Tasks
Now we will check if OCP DNS endpoints are configured for the services.
In the blueprint's main window, expand the application and services pane
Click on the Worker service and select the Create DNS Entry action
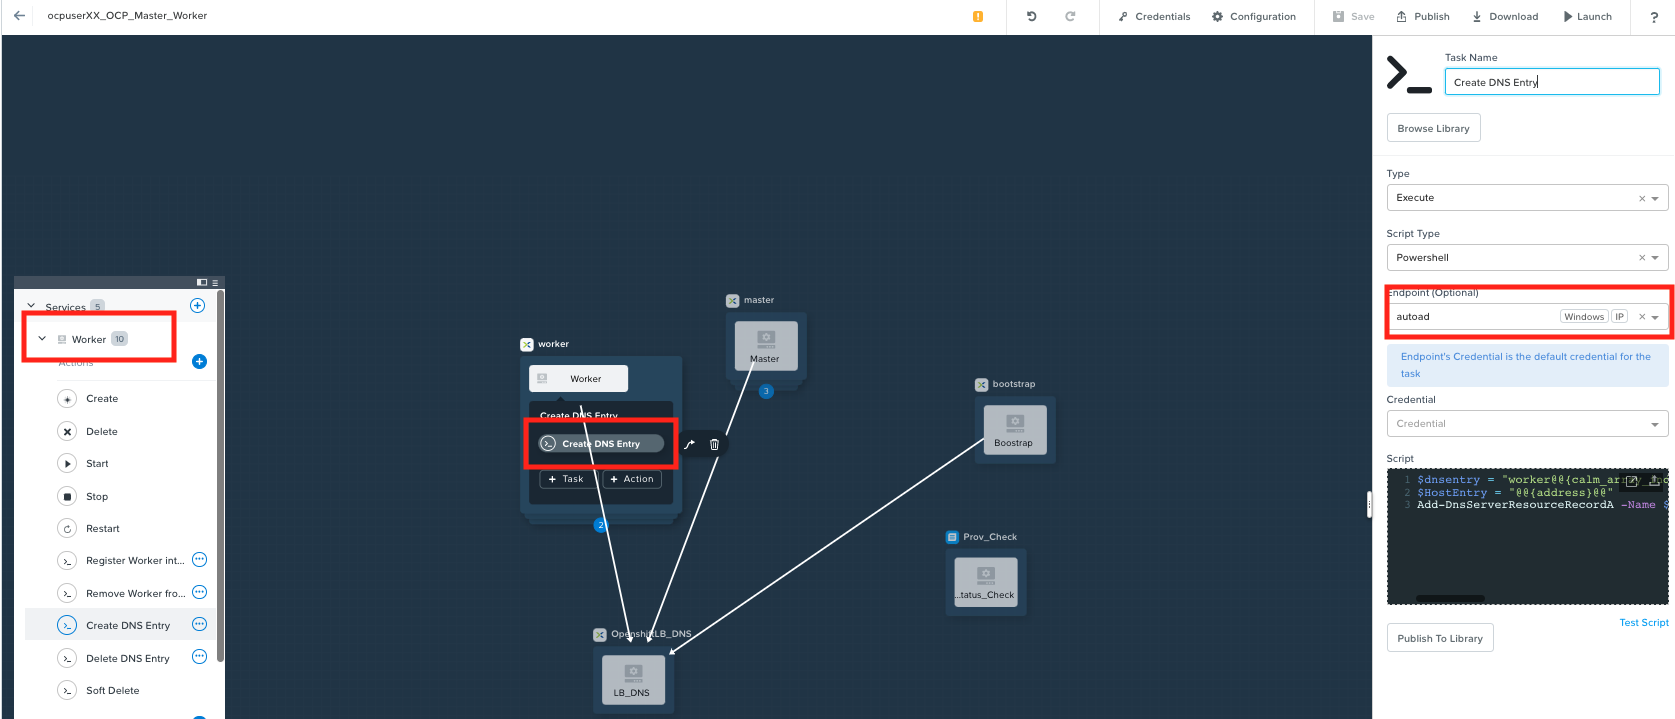
Confirm that the endpoint is the autoad that you previously confirmed
Confirm the autoad for Delete DNS Entry task
Confirm the autoad endpoints for Create DNS Entry and Delete DNS Entry for the following services:
- Bootstrap
- Master
If the endpoint is not assigned properly, correct the condition
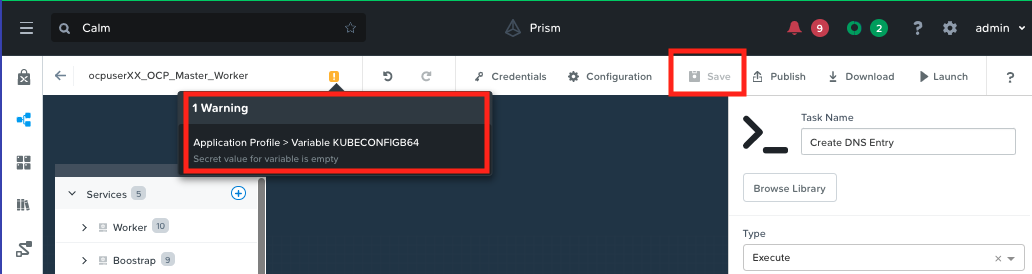
Save the blueprint and confirm there are no validation errors (warnings about KUBECONFIG (runtime variable) can be ignored)
Deploying OCP Cluster
In Prism Central > Services > Calm
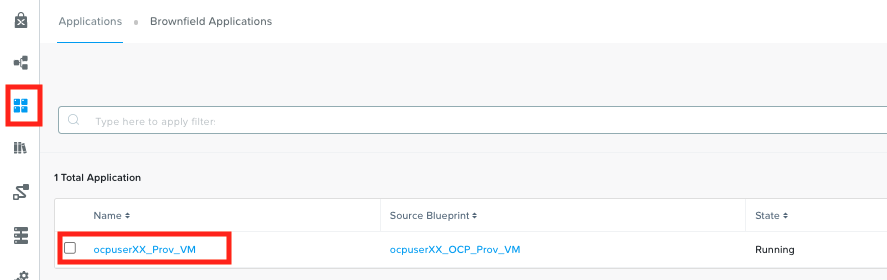
Click on Applications
Select your Provisioning VM Initials_PROV_VM application
Click on Manage tab
Click on the play button next to Deploy OCP action
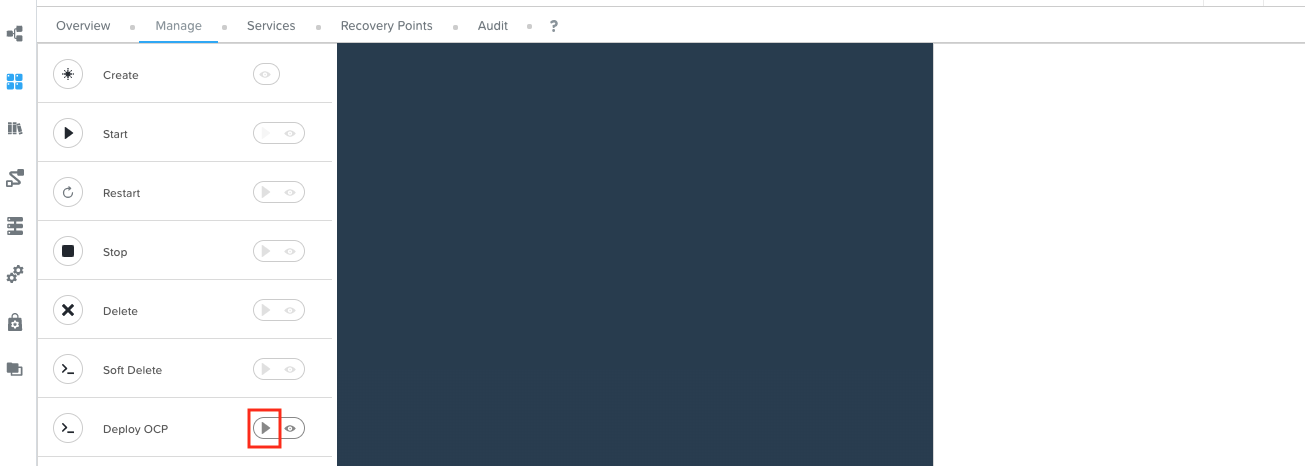
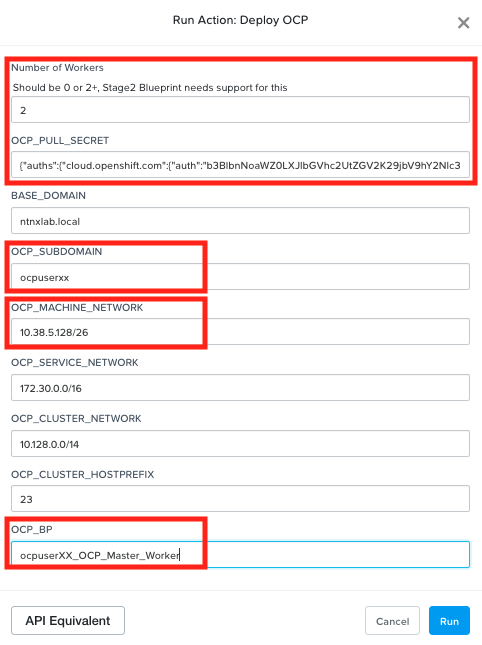
This will open up Run Action: Deploy OCP window for user inputs
Fill only the following details:
- Number of Workers - 2
- OCP_PULL_SECRET - download/copy pull secret this from your Red Hat Portal Login (you will need Red Hat Portal Access)
- OCP_SUBDOMAIN - ocpuserXX (e.g. ocpuser01)
- OCP_MACHINE_NETWORK - provide your Primary network address for your HPOC/SPOC (e.g. 10.38.2.64/26 ) - check in your cluster reservation lookup webpage
- OCP_BP - name of the ocpuserXX_OCP_Master_Worker
blueprint2that you uploaded (e.g. ocpuserXX_OCP_Master_Worker)
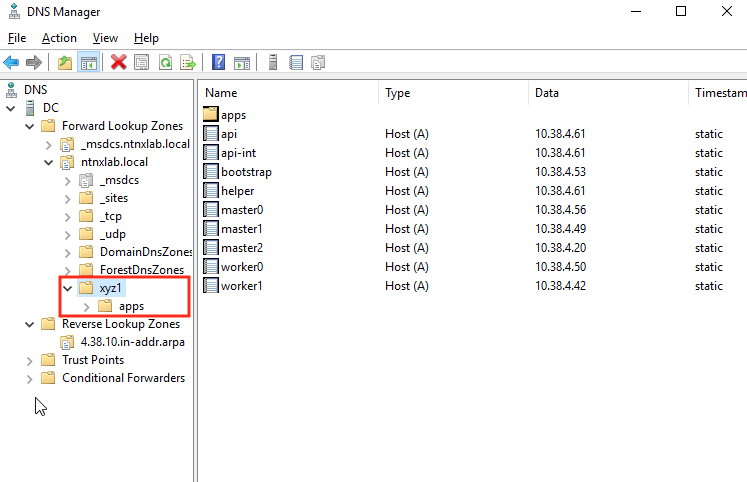
Check your subdomain/ocp cluster name?Make sure that the OCP_SUBDOMAIN name is be unique for each OCP cluster you deploy with this blueprint. A DNS zone is created based on this subdomain name.
You can observe this in DNS in your AutoAD VM for other deployed clusters.
Click on Run
Go to the Audit tab to check the stautus of the launched Deploy OCP action
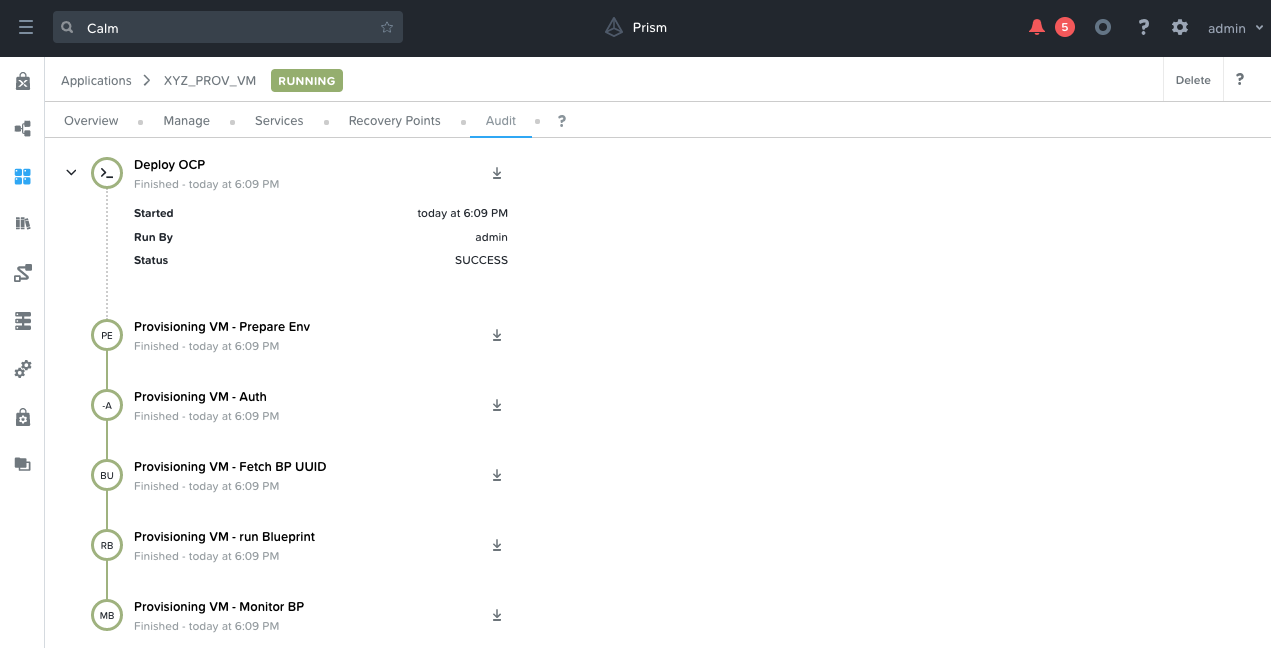
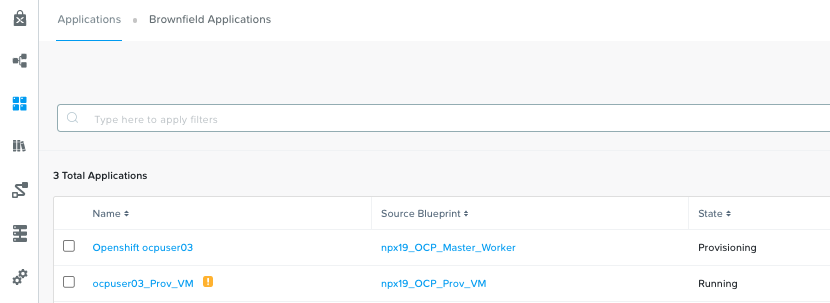
If this action launch is succesful, you will see another application Openshift ocpuserXX in the Calm > Applications in a Provisioning state (this might take up to 5 minutes to show up in the Web UI)
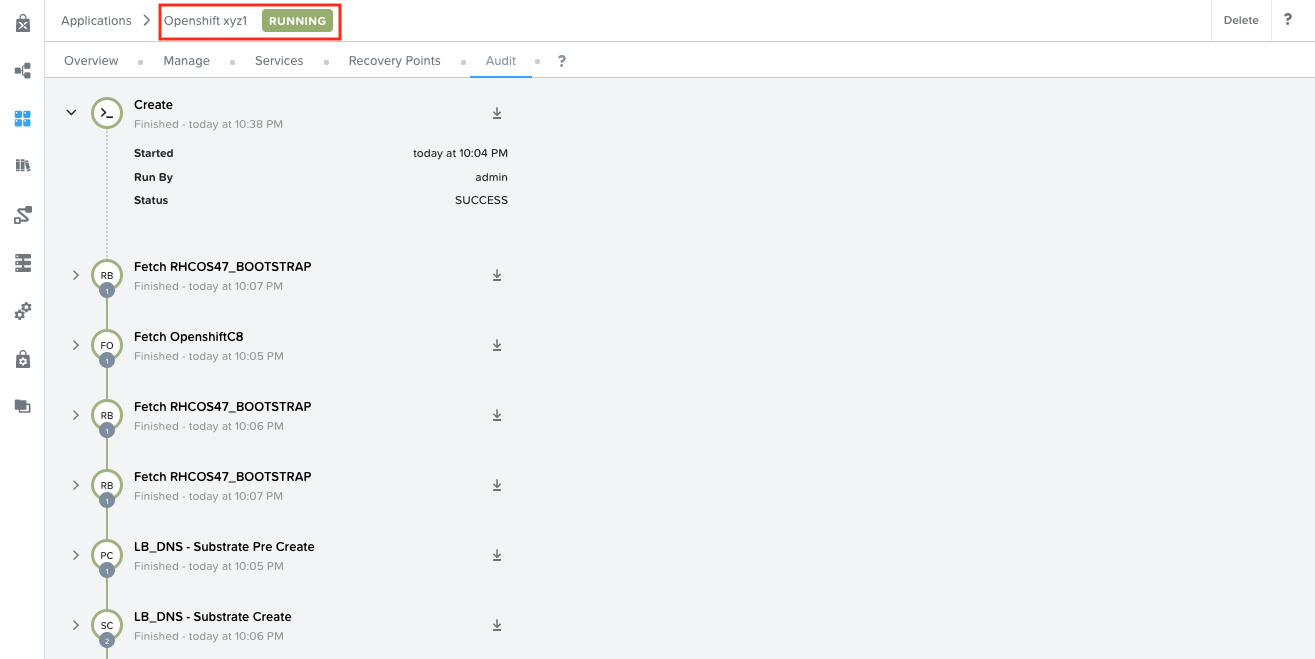
Click on the Openshift ocpuserXX application and go to Audit tab
Observe the VM create, package install and other Calm actions
This should take about 30-35 minutes
Meanwhile you can notice that Prism Central's event will be getting quite busy. This is a result of VMs, storage, etc,. getting provisioned by Calm using REST calls to Prism Cental
Once deployed the Calm application Openshift ocpuserXX will be in a running state
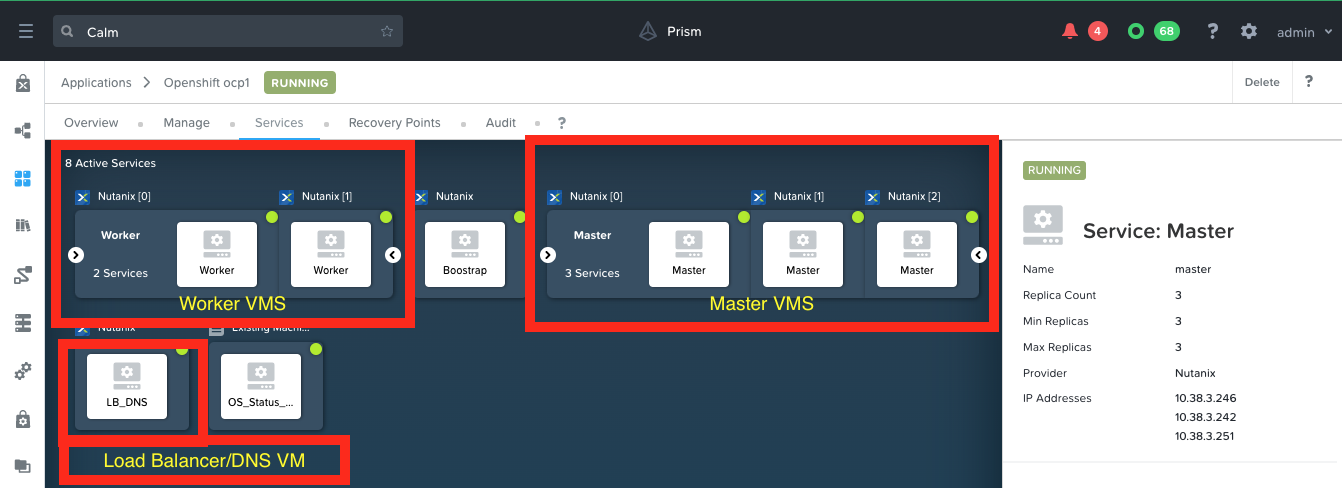
Now that your OCP cluster has been deployed, in the Services tab, lets explore the VMs (Services in Calm) and their corresponding functions.
Click on each VM (Service) will display IP addresses and Open Terminal options. We will be using the private key to ssh into these VMs (if required)
We have completed this section of the lab where our OCP cluster is sucessfully deployed.
Day 0: Getting OCP Cluster Login Details
In Calm > Applications
Click on the Openshift userXX application and go to Audit tab
Go to the end of the audit trail and look for OS_Status_Check Start task and expand
Click on OS_Status_Check - Show Login Information sub task and click to maximize the output window
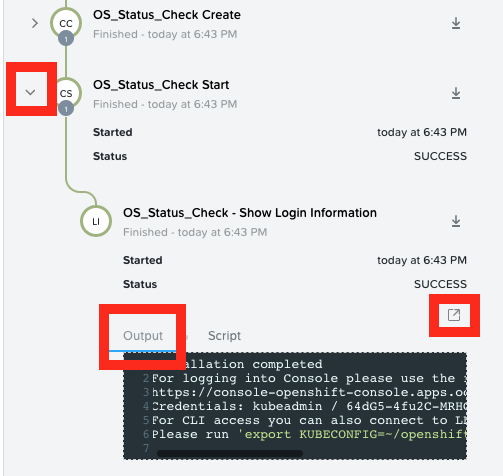
Make a note of the following:
- Console URL
- Credentials: Username / password
 caution
The password and URL will be different for your OCP cluster.
Note this down as you will need these credentials to logon to the OCP cluster managment console
Now that you have finished IPI install, you can move on to the OCP Command Access section and then on to workloads section.